Hi everybody.
So there has been a lot of buzz (and confusion) on the internet, to get a non-Mac GPU – namely the Geforce GTX Titan – working inside a 2010 Mac Pro.
On the web there are many configurations to be seen, that incorporate an external power supply, which is somewhat shortcutted to make it work, etc. etc. but no clear statement on what will work fine, how much power is needed and so on.
So here’s a little story about our project, done with Besserdrei in Munich, to get the card going inside a MacPro tower and what we discovered – may it be useful to you.
Upfront, I can say the following: If you’re planning on running Resolve in your MacPro with a TITAN as processing card and another GPU for the UI, this -does- work. However, testing with the TITAN and a GT120 we did not see any improvement wrt performance. We also tried with an older Quadro 4000 as GUI-card (or additional processing card for AE), and still did not see a big enough improvement to justify keeping the card in, so we just kept the TITAN only in the end. But from a power supply point of view, it would’ve worked (especially since the Quadro 4000 also needs a 6pin-power boost).
Noticably, we had a Decklink-card + USB 3.0 card working inside there (and drawing power) at the same time when testing.
This machine has now been running at full throttle over the last 4 weeks, and we have not encountered any drawbacks, freezes, crashes, or whatsoever. So it is safe to assume, that the way we did it, is pretty safe to go.
1) Let’s do some math!
Before we dive into putting the system together, a few numbers:
The GeForce TITAN has a maximum TDP of >250 watts – this is the fact, that’s causing headaches to everybody, planning on putting a TITAN into his MacPro.
Thing is: Each of the PCIe 2.0-slots provides only 75 watts.
In addition to that, the two mini 6-pin connectors on the motherboard provide 75 watts each.
The card itself has both, a 6-pin power connector and an 8-pin connector.
Again, the 6-pin connector wants to be supplied with 75 watts max., whereas the 8-pin connector is built to expect / transport up to 150 watts – you won’t get those out of the second mini 6-pin connector from the MacPro motherboard – it can only deliver 75 watts.
So, to get the card fail-safe running, we need to get those 250+ watts from somewhere. The PCIe-slot delivers 75 watts and one of the two mini 6-pins, connected to the card delivers another 75.
Now there’s 100 watts missing, which we cannot get out of the second mini 6-pin, so there is only one source of power left: The power connector for the second optical drive at the very top of the tower. This is what we are going to use for the remaining 100 watts. The MacPro power supply can deliver 980 watts all in all – that should be enough to power the TITAN.
2) What do we need?
Fairly easy – apart from the TITAN itself, it’s just about adapters and screwdrivers. You can get everything from Amazon:
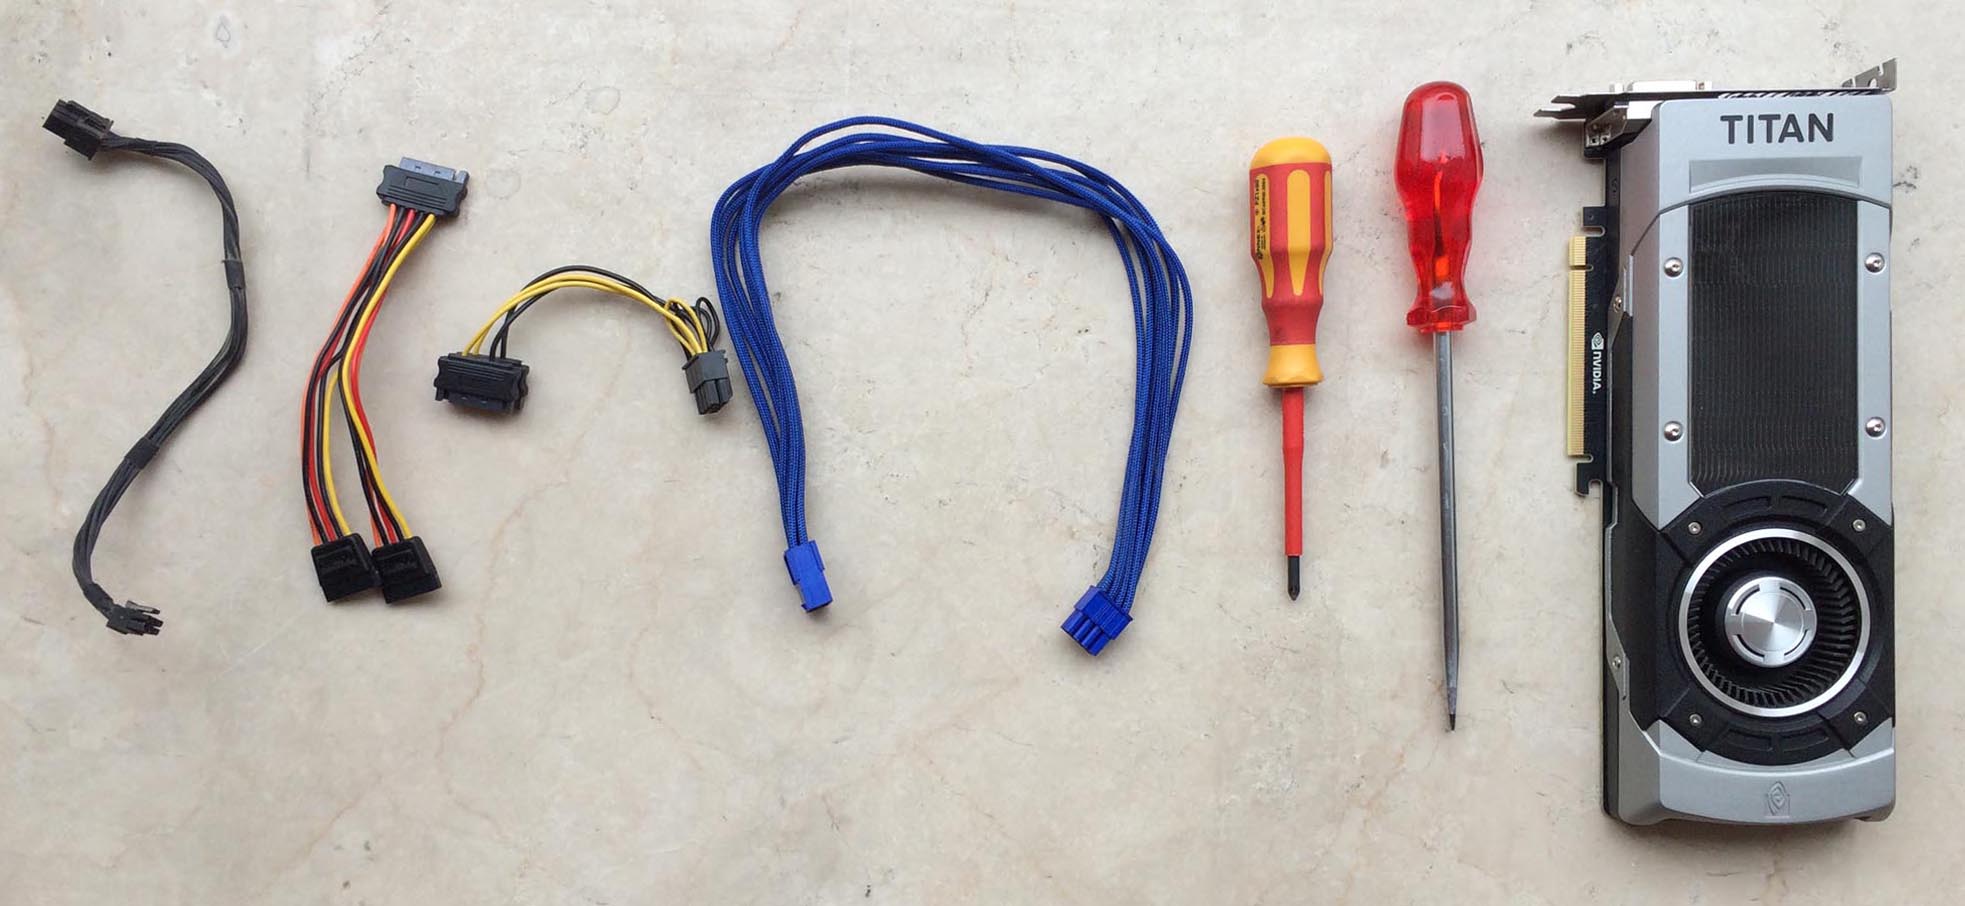
– adapter to split the SATA power connector from the PSU into two
(called SATA Y-cable)
– adapter to merge the new two SATA power connectors into
one 8-pin power connector
– extension-cable to get the 8-pin connector from the top part
down to the middle part of the tower, where the TITAN resides
(be careful – do not buy an EPS-extension cable, as that won’t fit –
be sure to buy a GPU power cable extender! The extension cables from BitFenix are pretty good.)
– mini 6-pin to standard 6-pin connector (MacPro mainboard to GPU),
if you don’t already have
– strong slot screwdriver
– Phillips screwdriver
3) Software pre-installation
Okay, OSX won’t eat our non-mac Geforce by default. We need to install a driver, that makes the card available to OSX. We ran OS X Yosemite 10.10.2 – this is recommended, because the drivers for the TITAN are only supporting Mavericks and Yosemite.
Nonetheless, they seem to have a huge performance-bug with RED-debayering (via OpenCL) on Mavericks. Anyhow, we used this driver from Nvidia:
http://www.nvidia.com/download/driverResults.aspx/82983/en-us
Procedure is as follows: Boot up your MacPro, install the driver, power down MacPro, put the TITAN in and fire it up again.
Only thing to know is, that you need -any- kind of Mac-Nvidia card (e.g. GT120) in order to be able to install the webdriver.
If you’re running e.g. an AMD card inside your Mac Pro, the driver-installer will detect that and won’t let you continue with the install. Once installed, shut down the MacPro and disconnect it from any power (or better, from anything).
4) Let’s get started
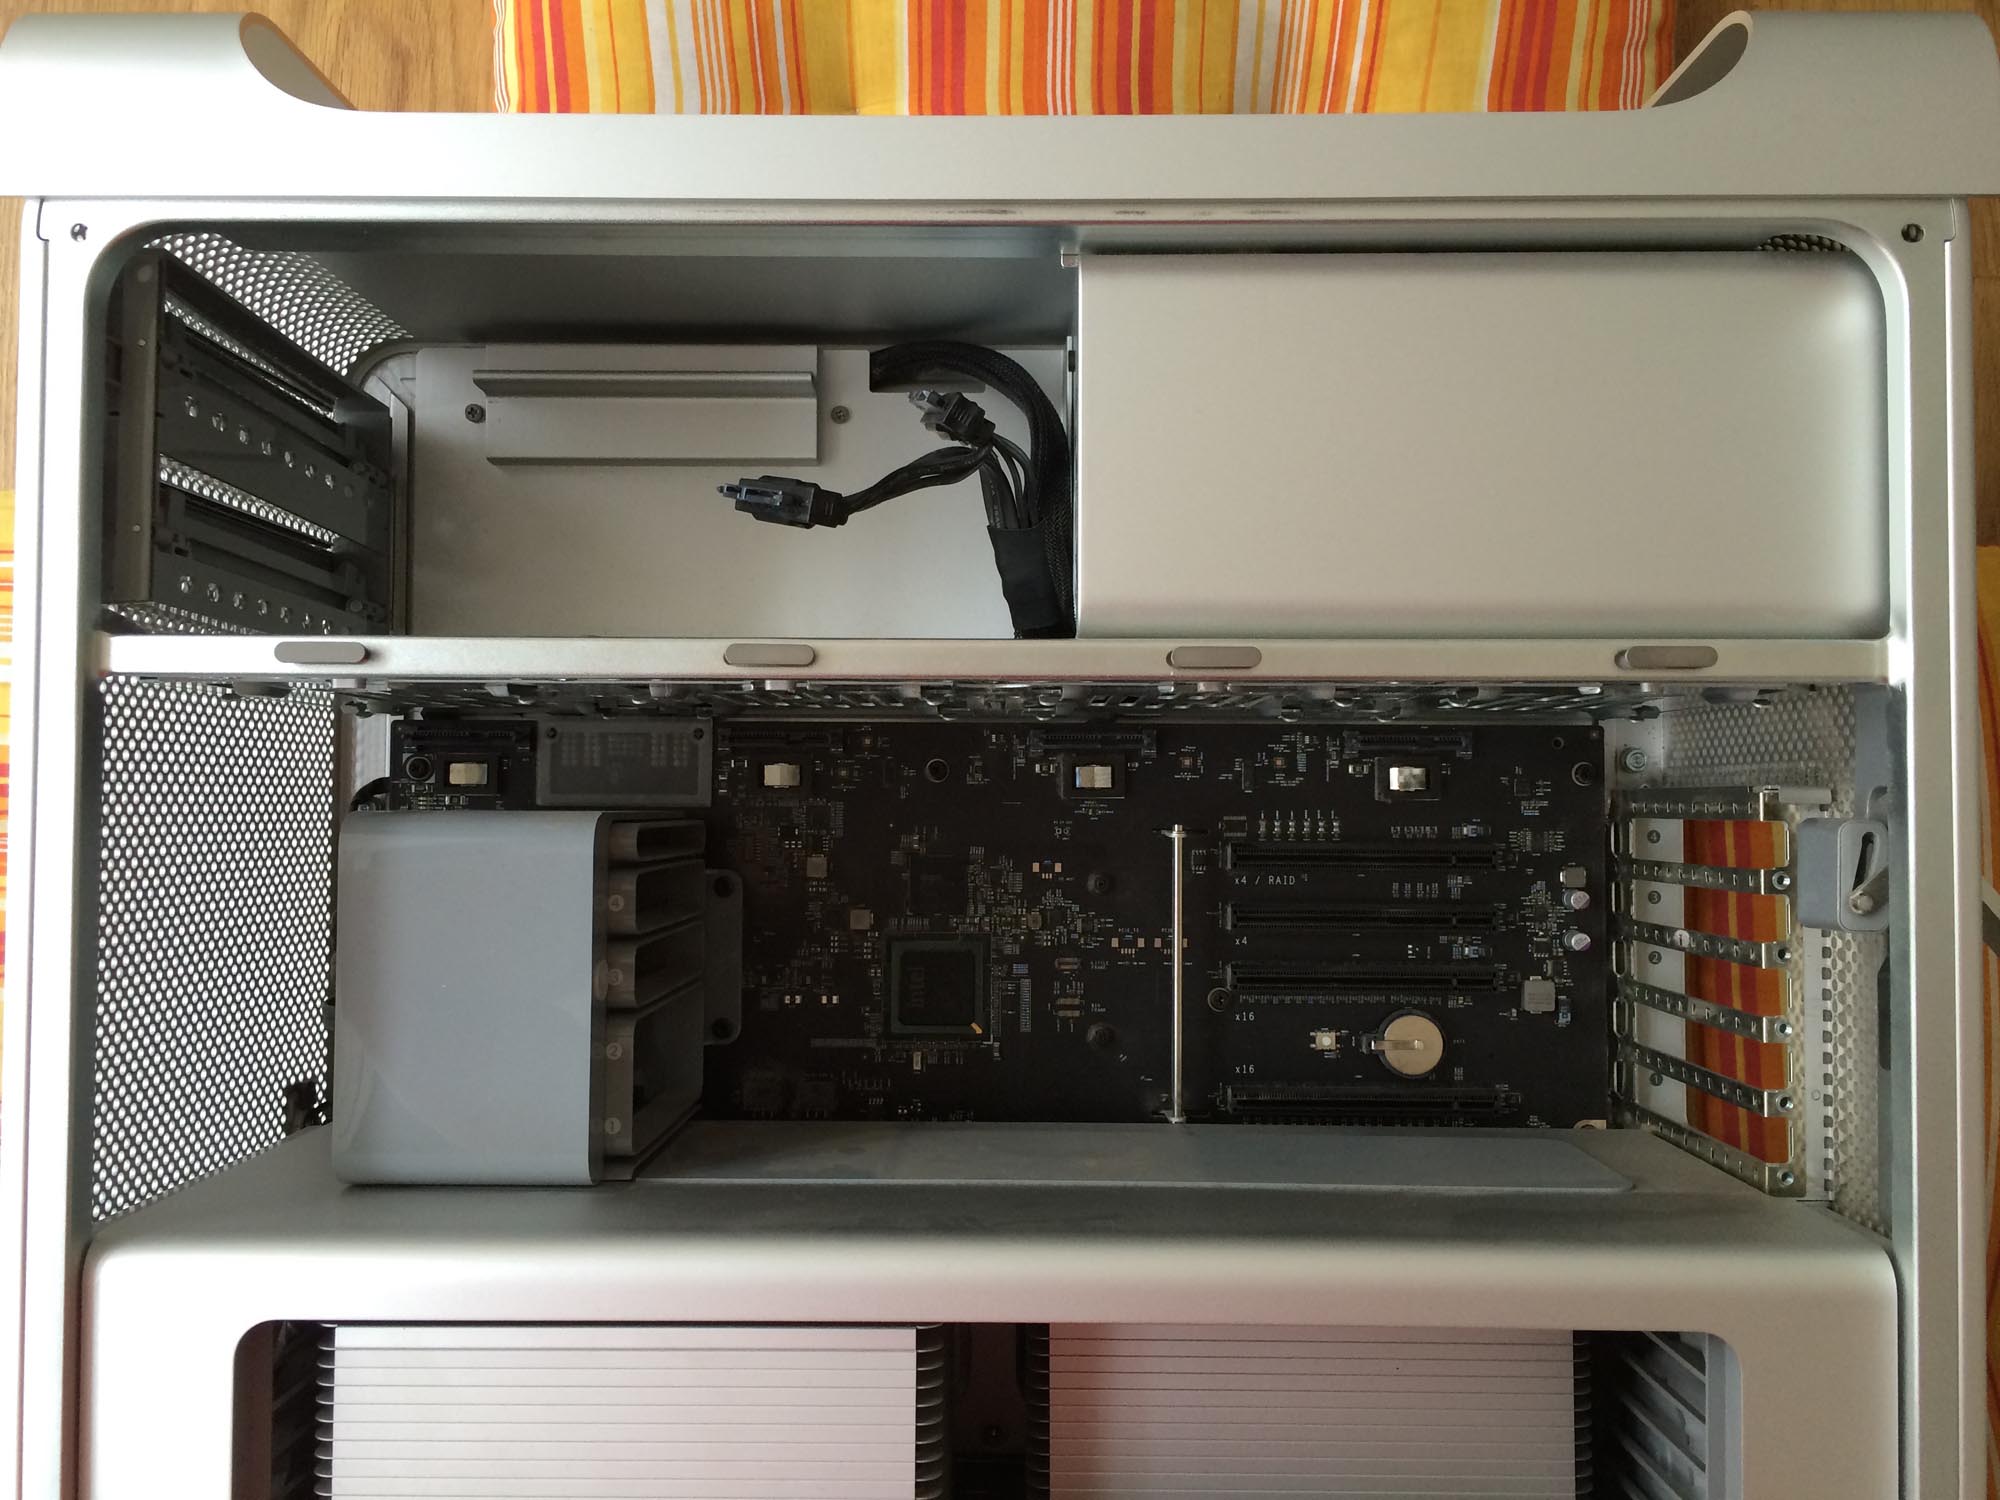
Okay, first step, obviously is to open up the MacPro, pull out all PCIe-cards, hard-drives and the 5 1/4” carrier (which in our case already contains an SSD as a system-disk, instead of an optical drive.. who needs those anyways).
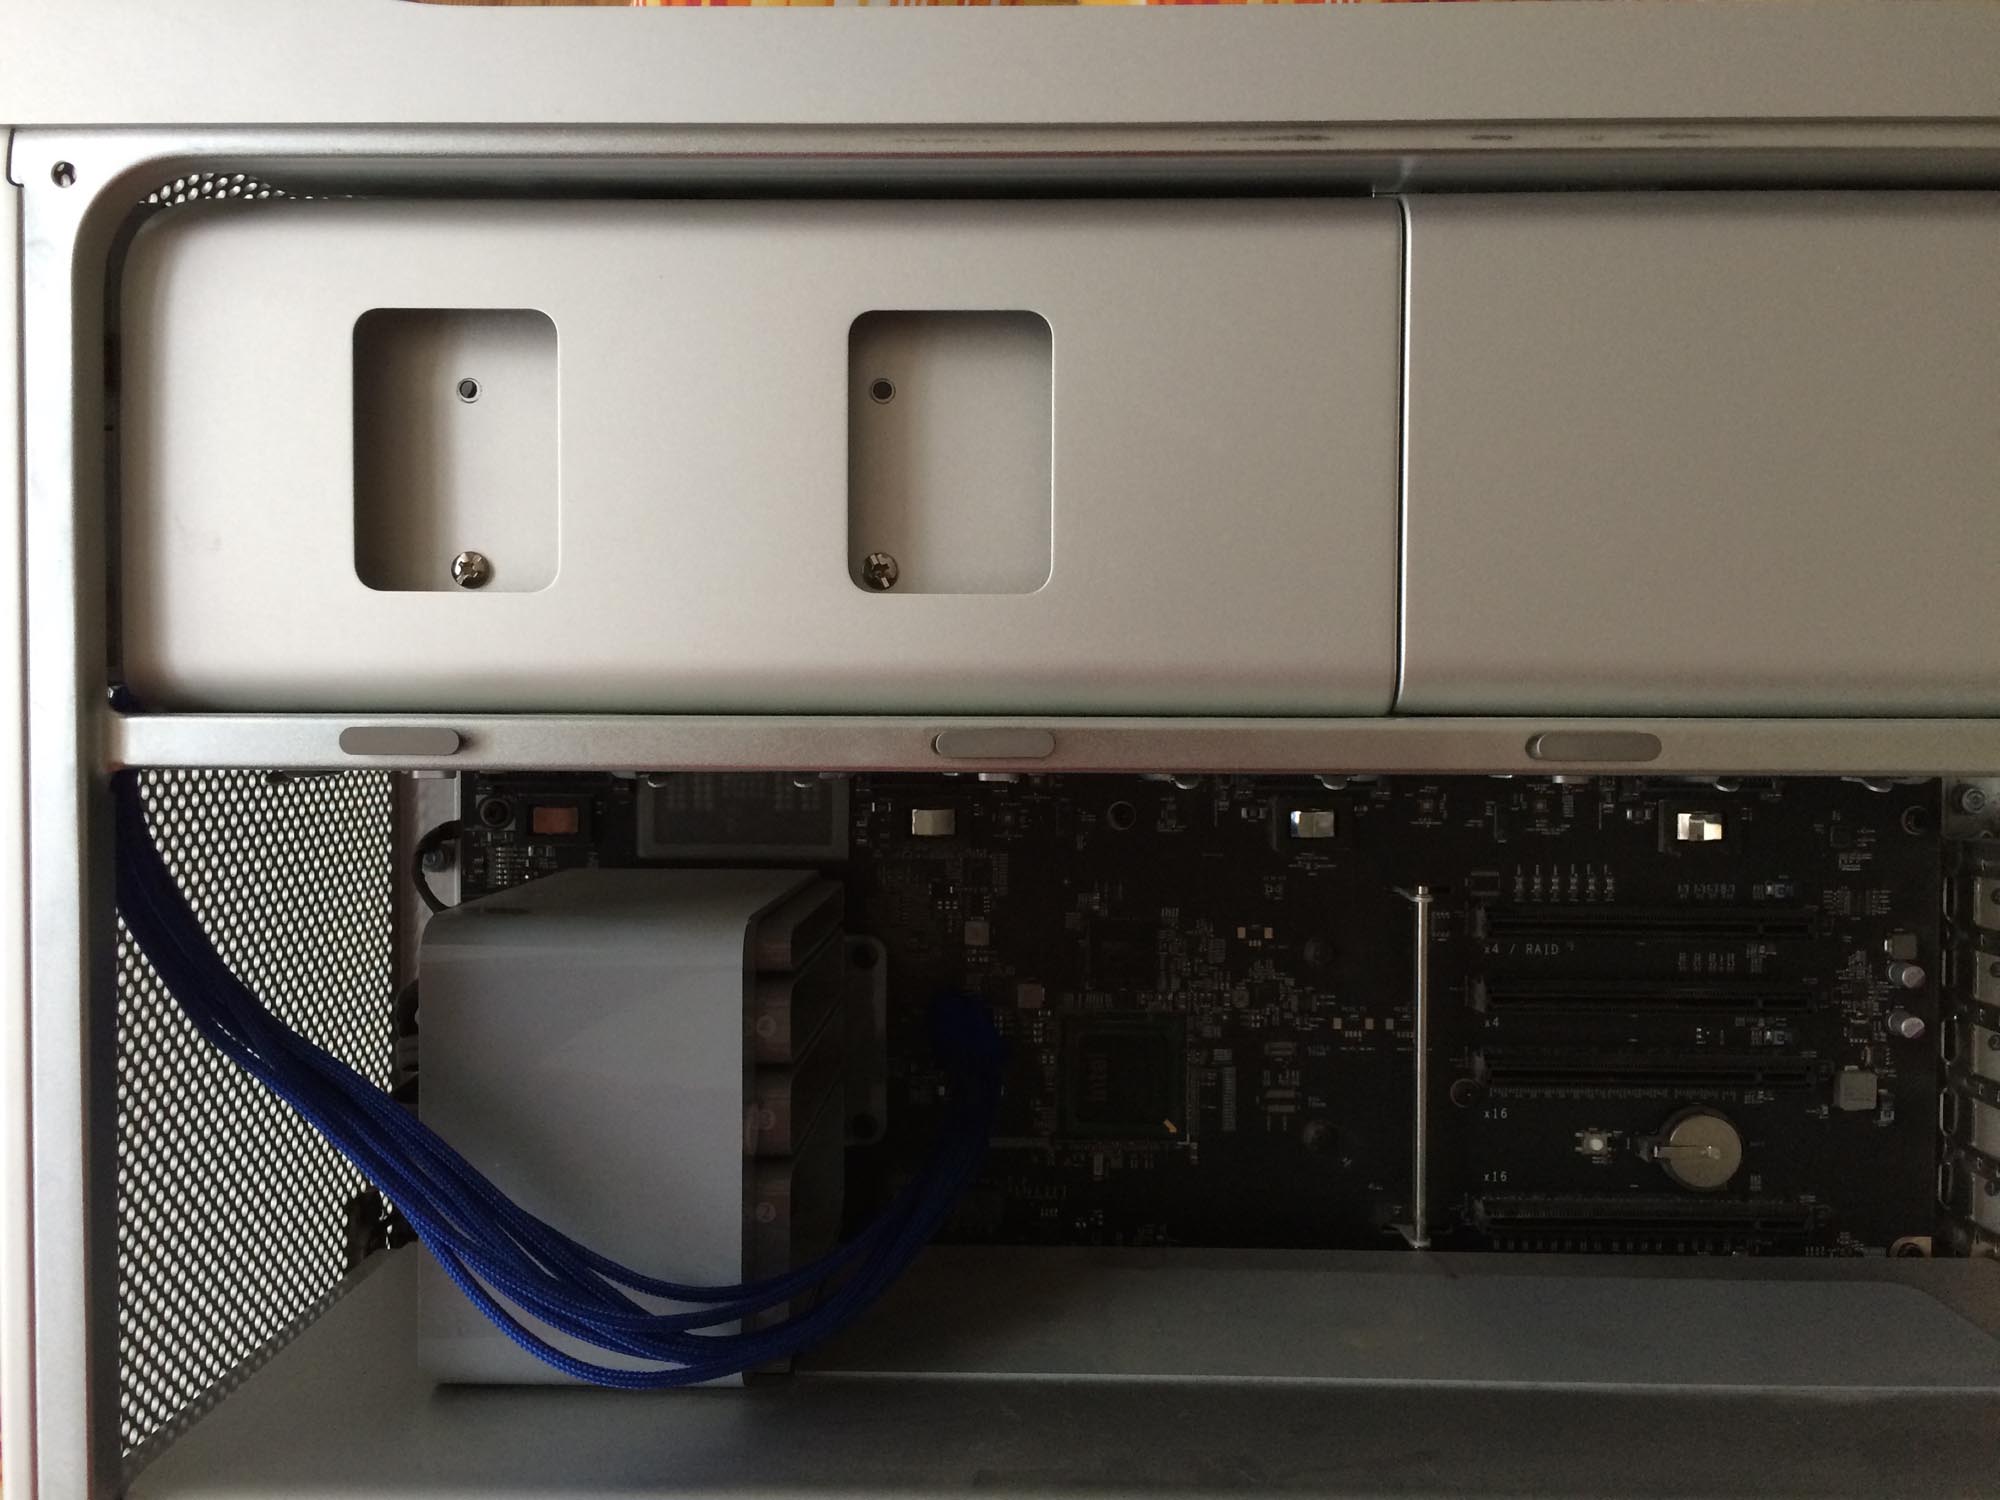
First of all, take out the screw, that holds the plastic front-frame of the two 5 1/4” drive bays.

Now use your thumb to lift it a little (don’t break it!), so you can use the slot screwdriver to bend up the little metal-lid below.
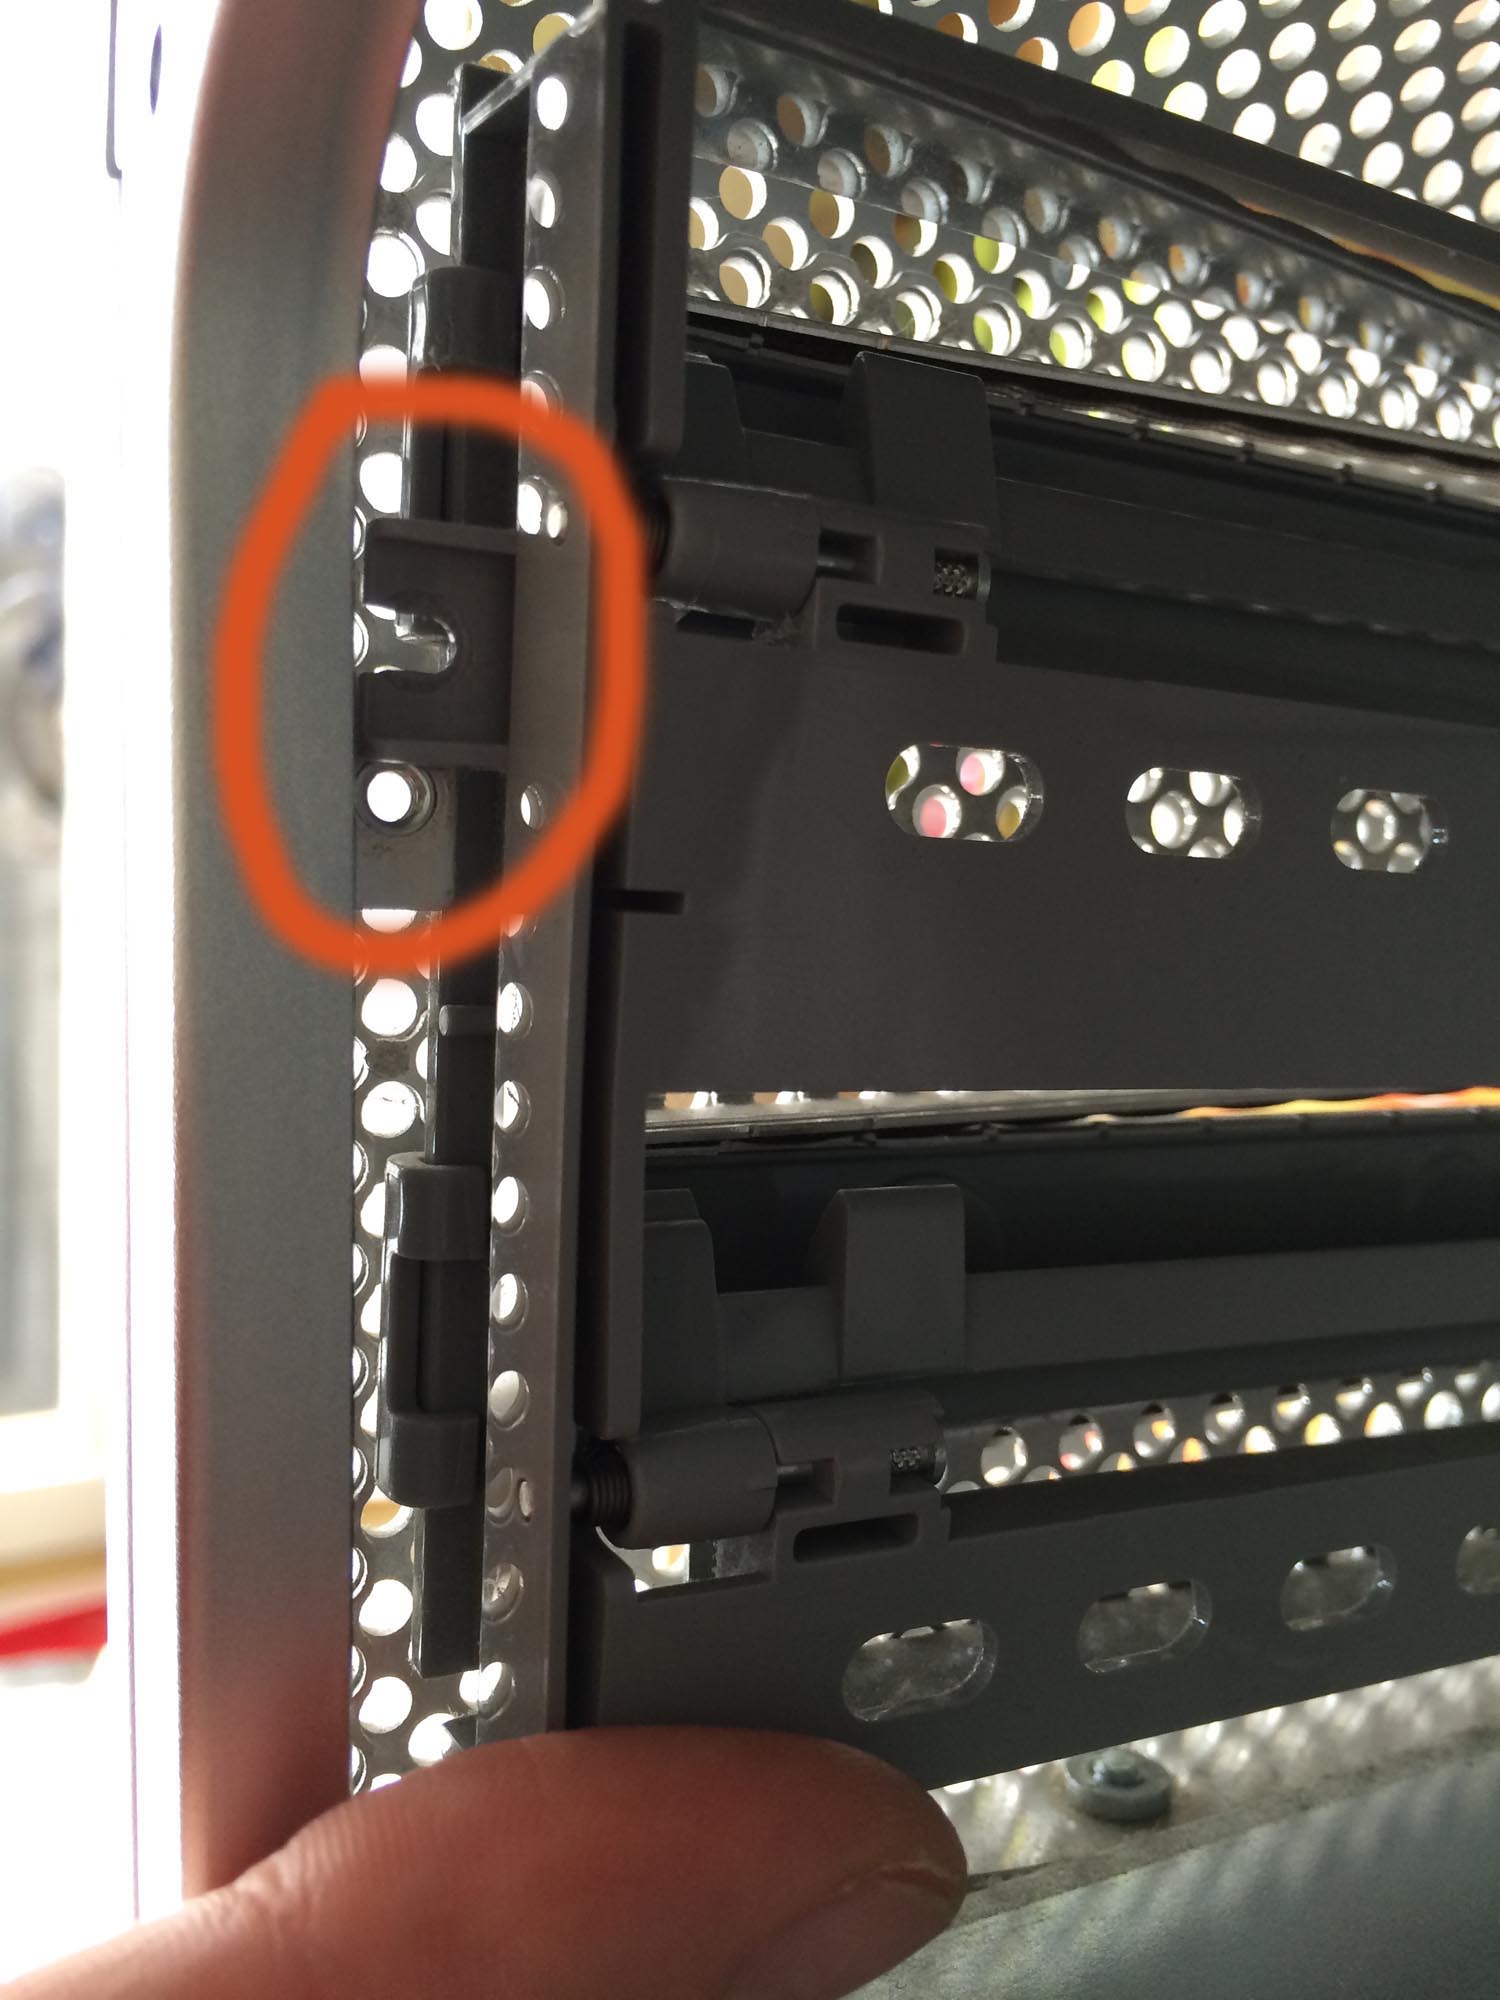
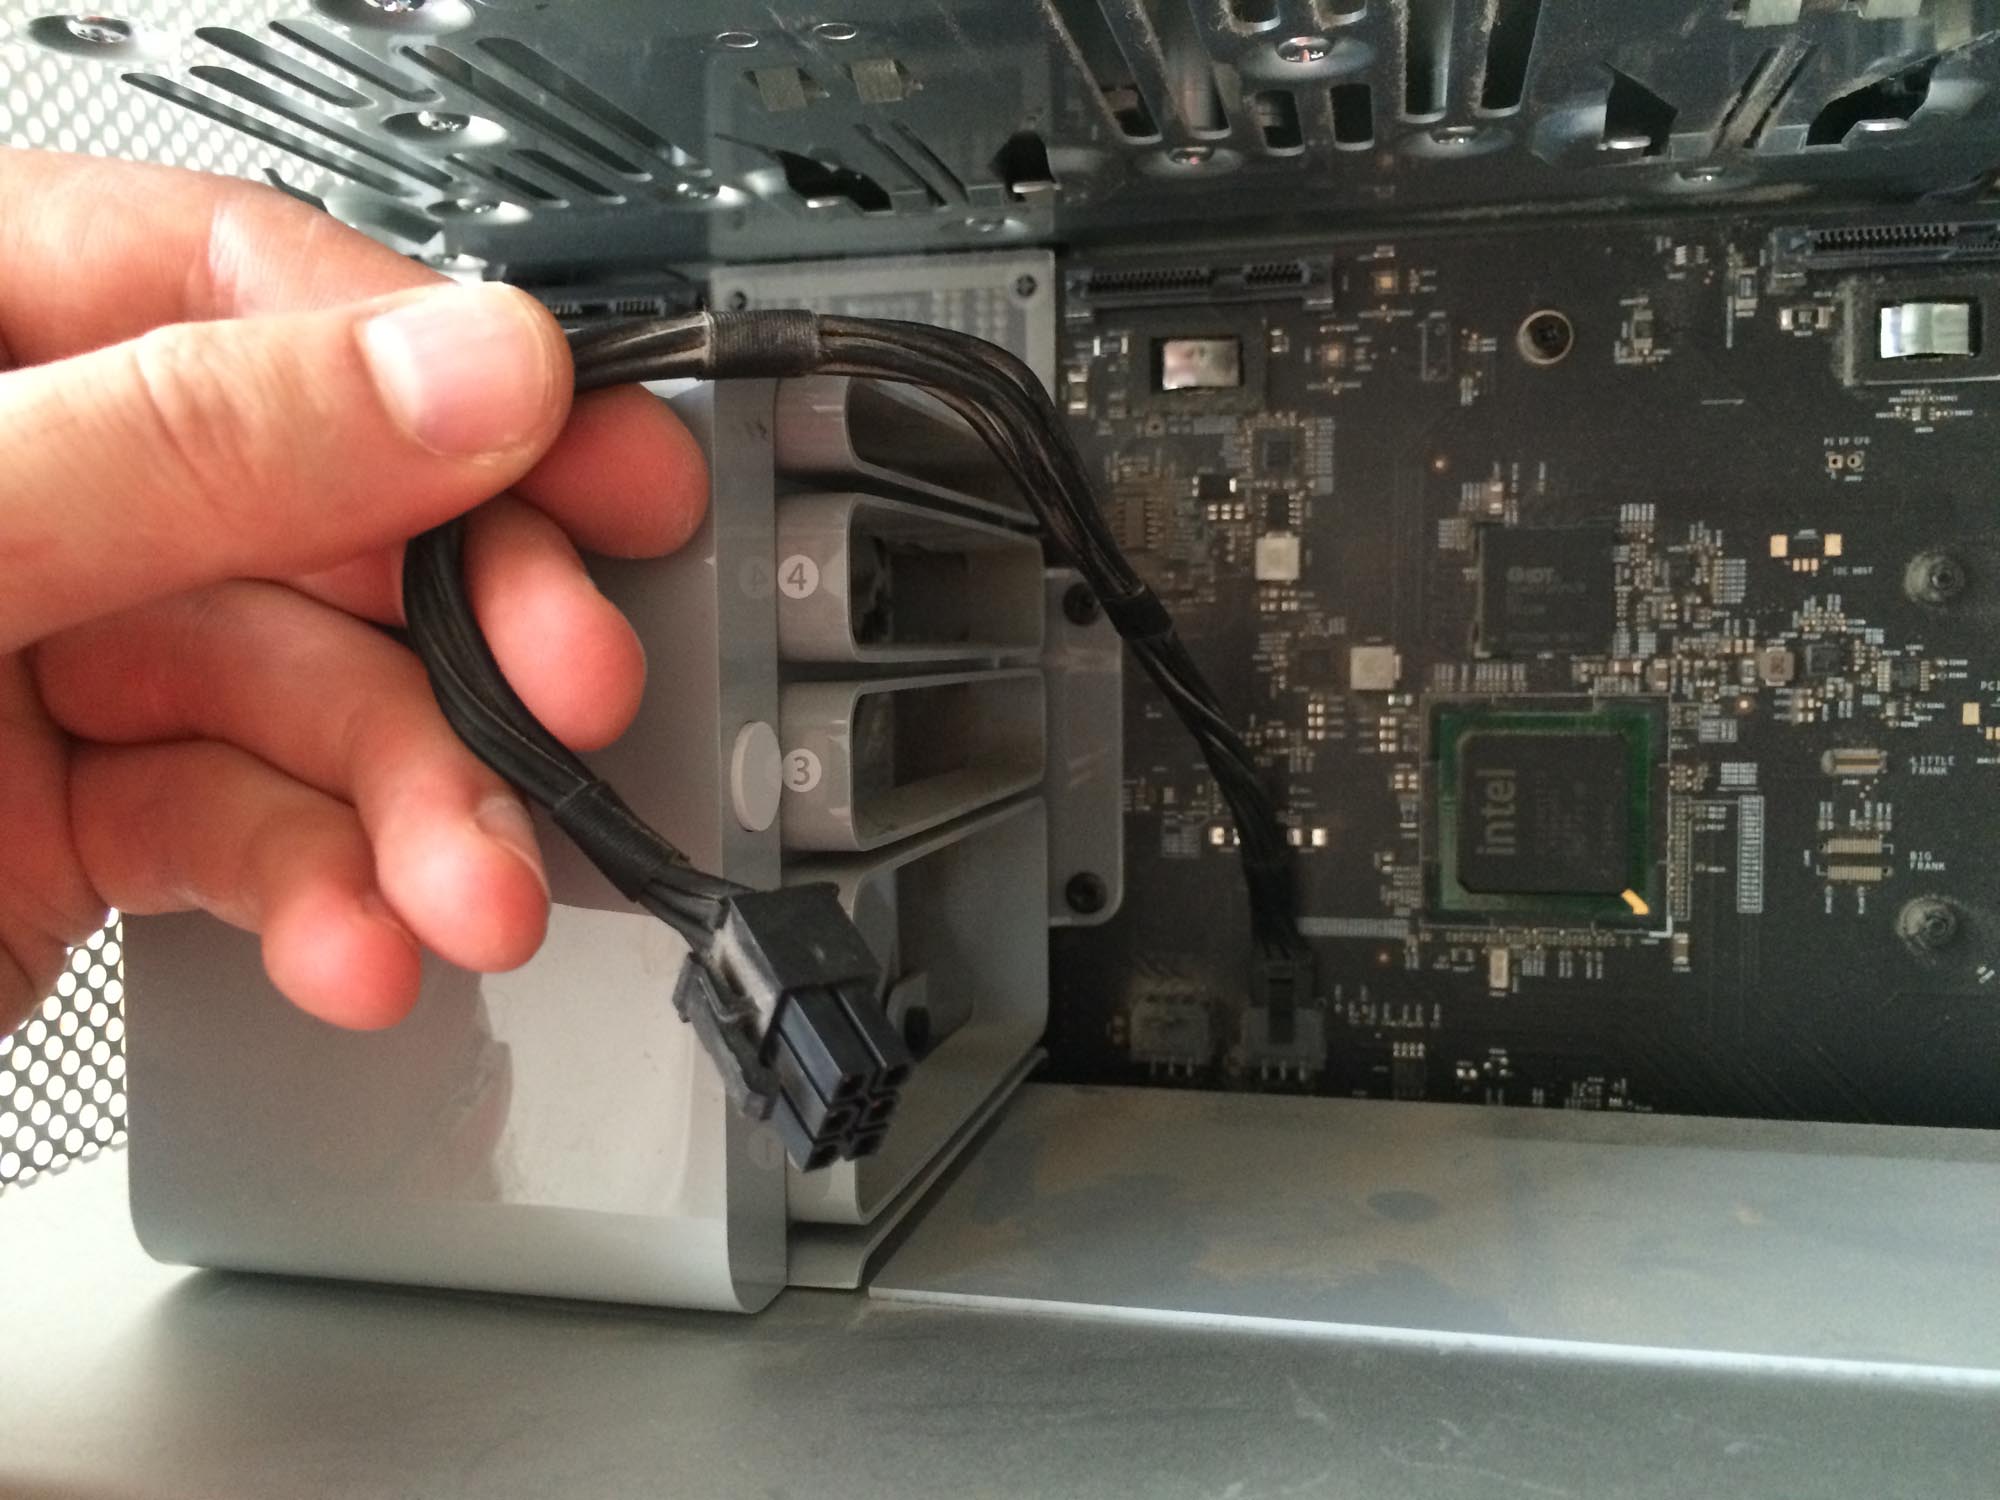
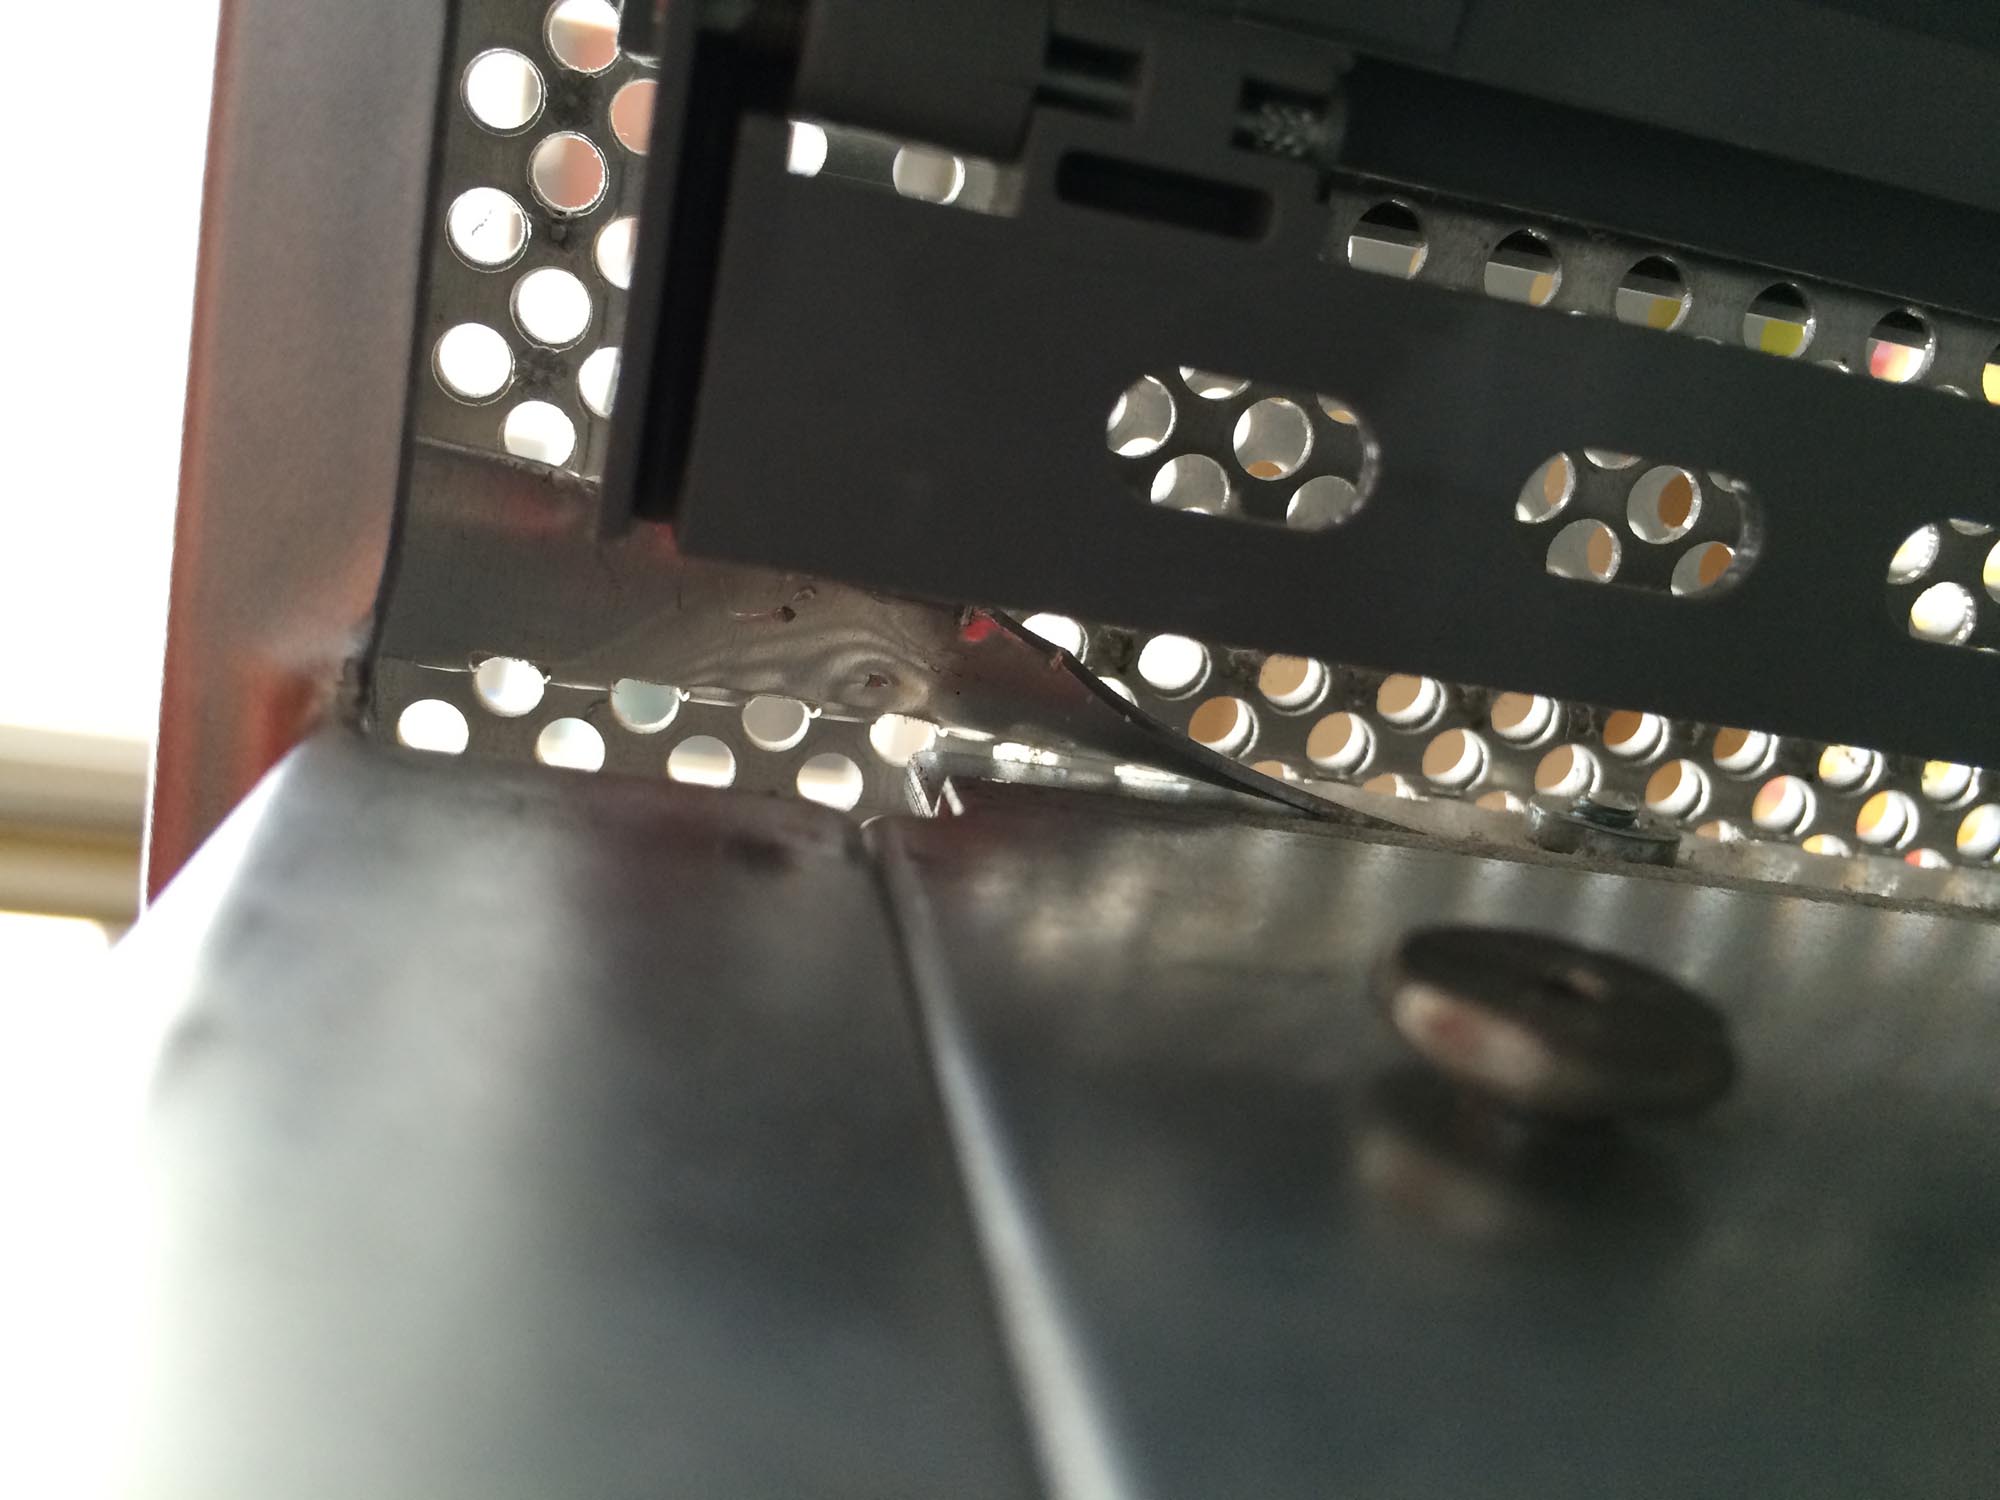 This is necessary to fit through the 8-pin extender cable – there really is no other way to get it down to the card easily.
There are plenty of people, who have not found that “security-hole” and have to leave their MacPro open, because the side-plate won’t close at all, if the cable is run outside the chassis. After lifting the little metal lid, let go of the 5 1/4” frame and pull through the extender-cable for the 8-pin GPU power – make sure to run it through in the right direction.
Once through, bend the lid down again, using the slot screwdriver.
Bend it down just enough to get the plastic frame back in place – not much more, since you will need the additional space later, when inserting the 5 1/4” drive carrier back in, so you don’t cut into the extender cable and everything fits nicely back in (see picture for reference).
Lastly, put back the screw holding the plastic frame.
5) Wiring
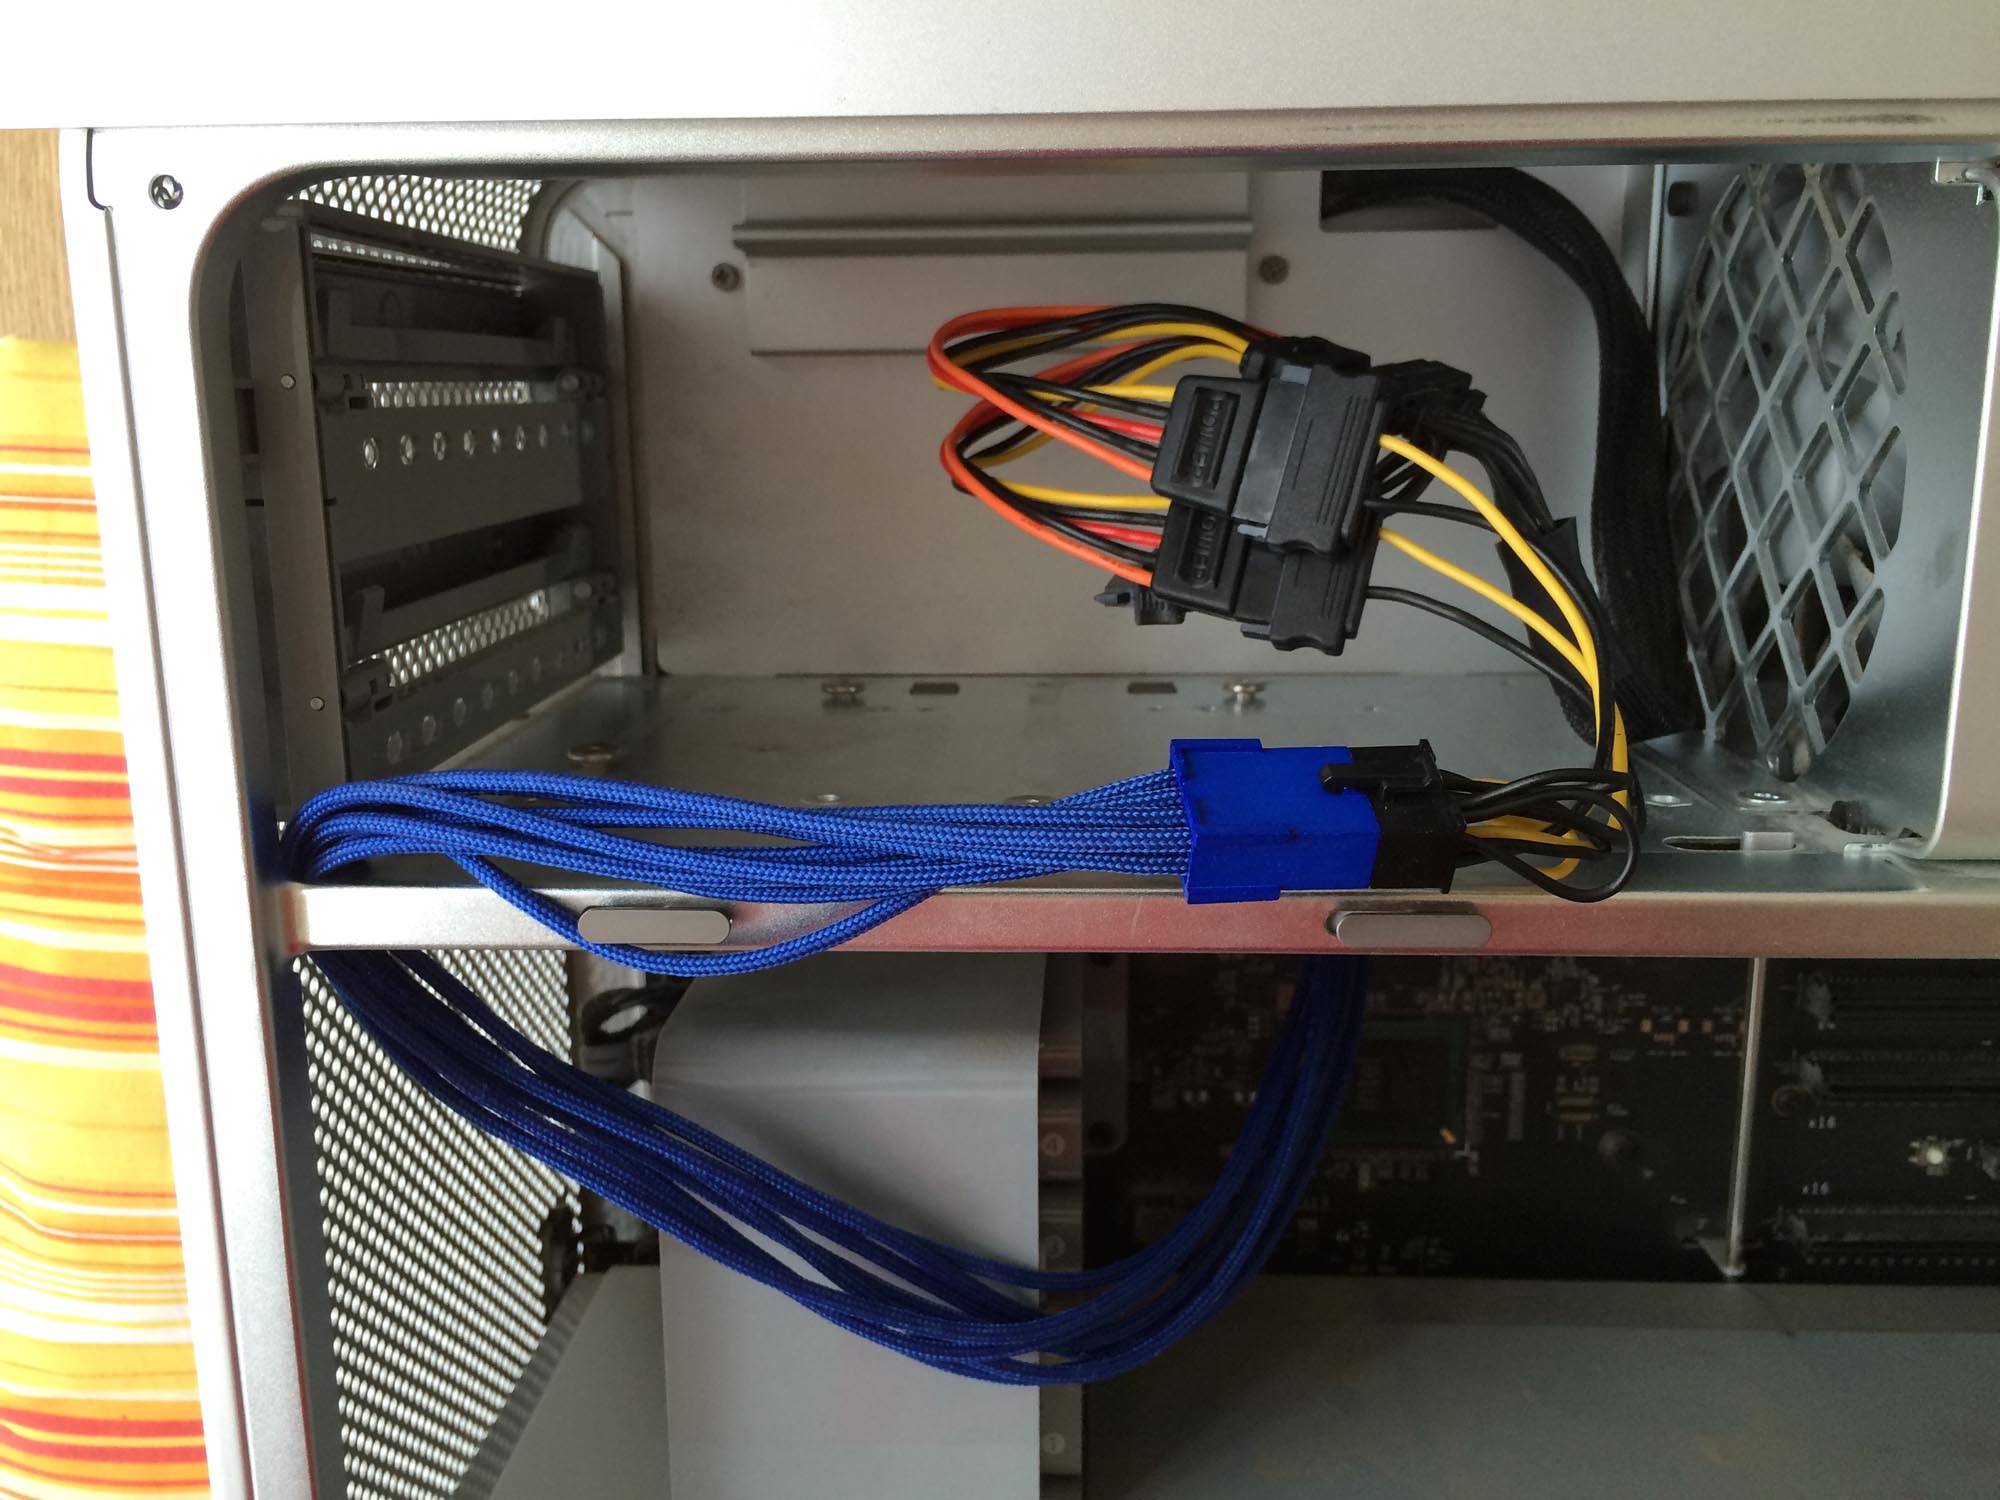
So this actually was already the hardest part – all that’s left to do is a little bit of wiring. First, take the SATA power y-cable. You need to cut away one of the clips on the side of the “jack”-end, in order to connect it to the power-connector coming from the PSU.
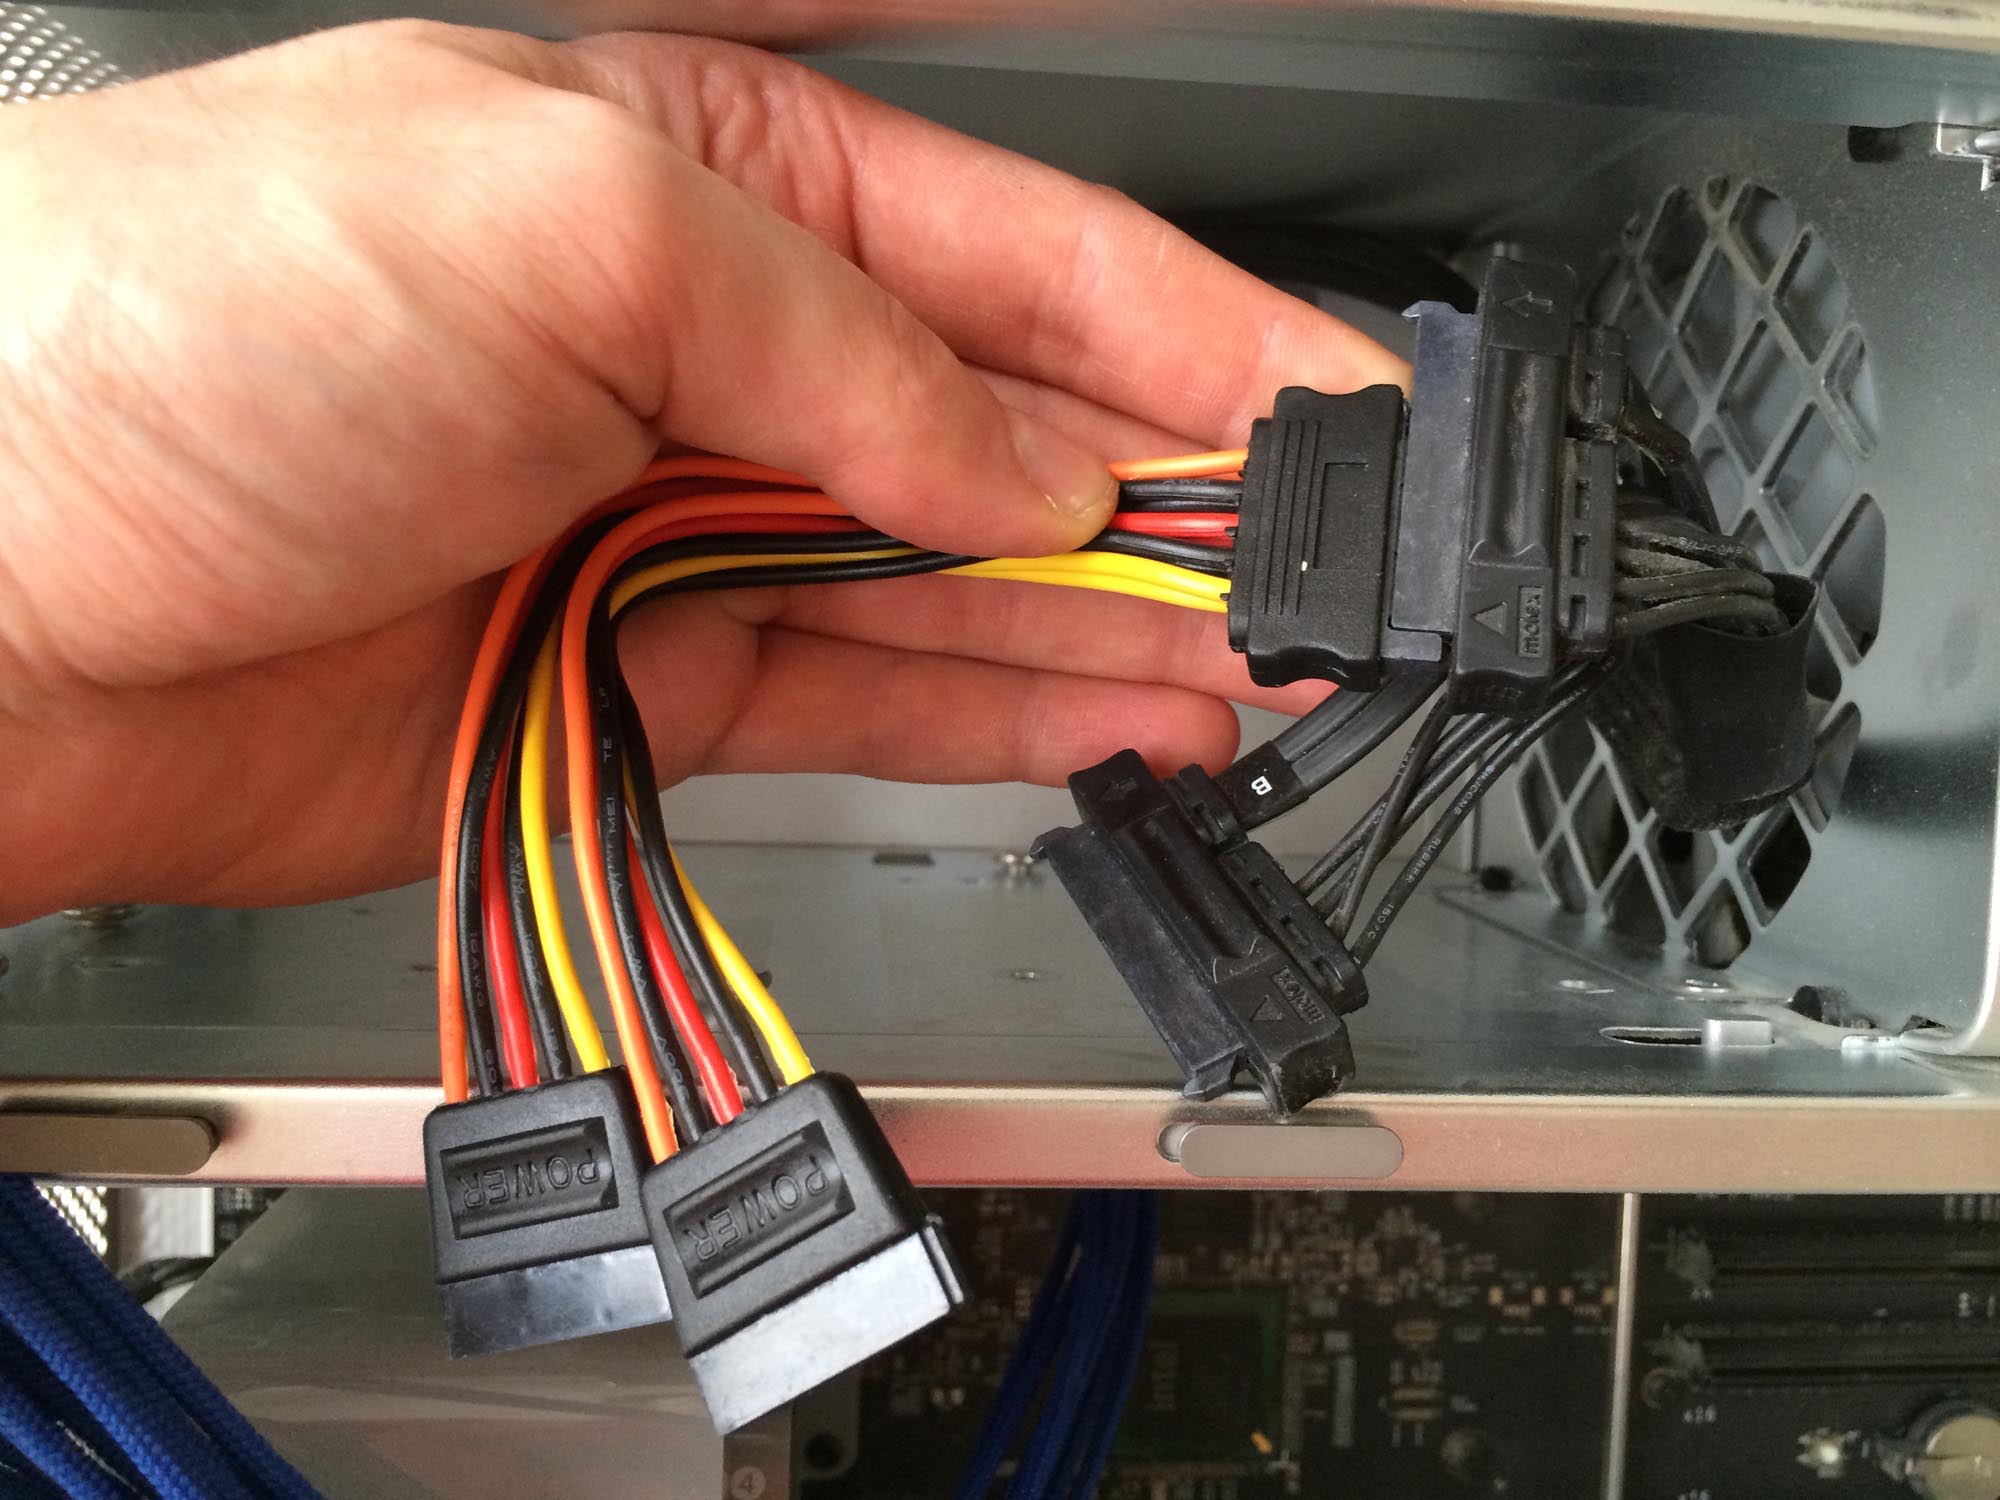
Next, connect the 2xSATA to 1×8-pin adapter to the two SATA power connectors from the y-cable.

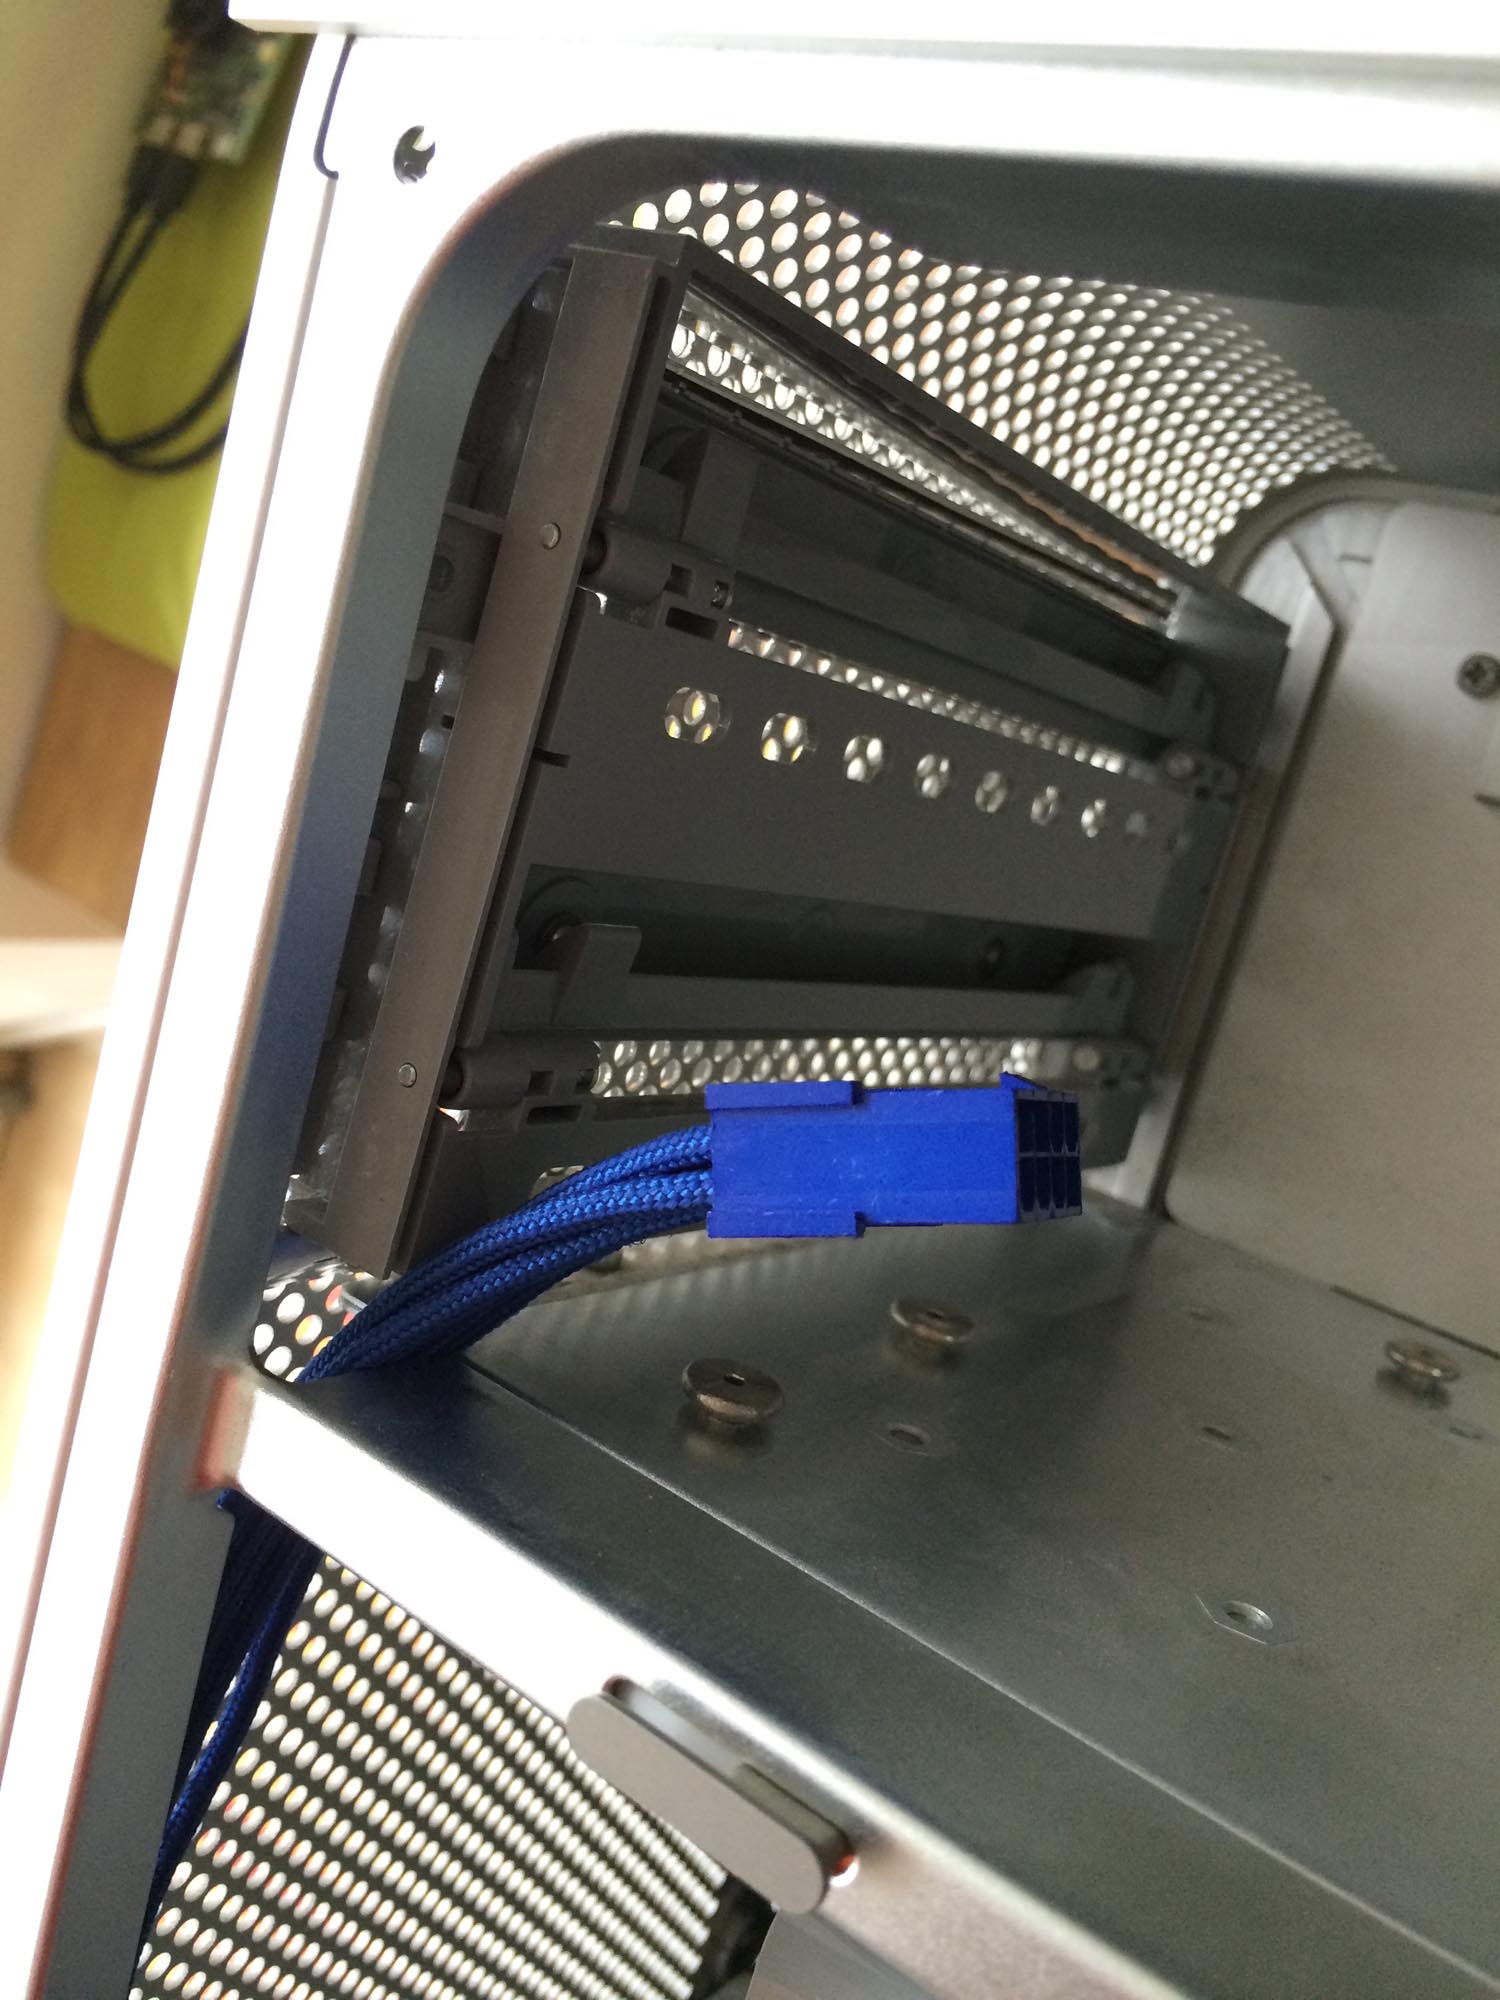
Then again, connect the 8-pin power connector to the 8-pin extension cable (blue in our pictures), to get that power one floor down.
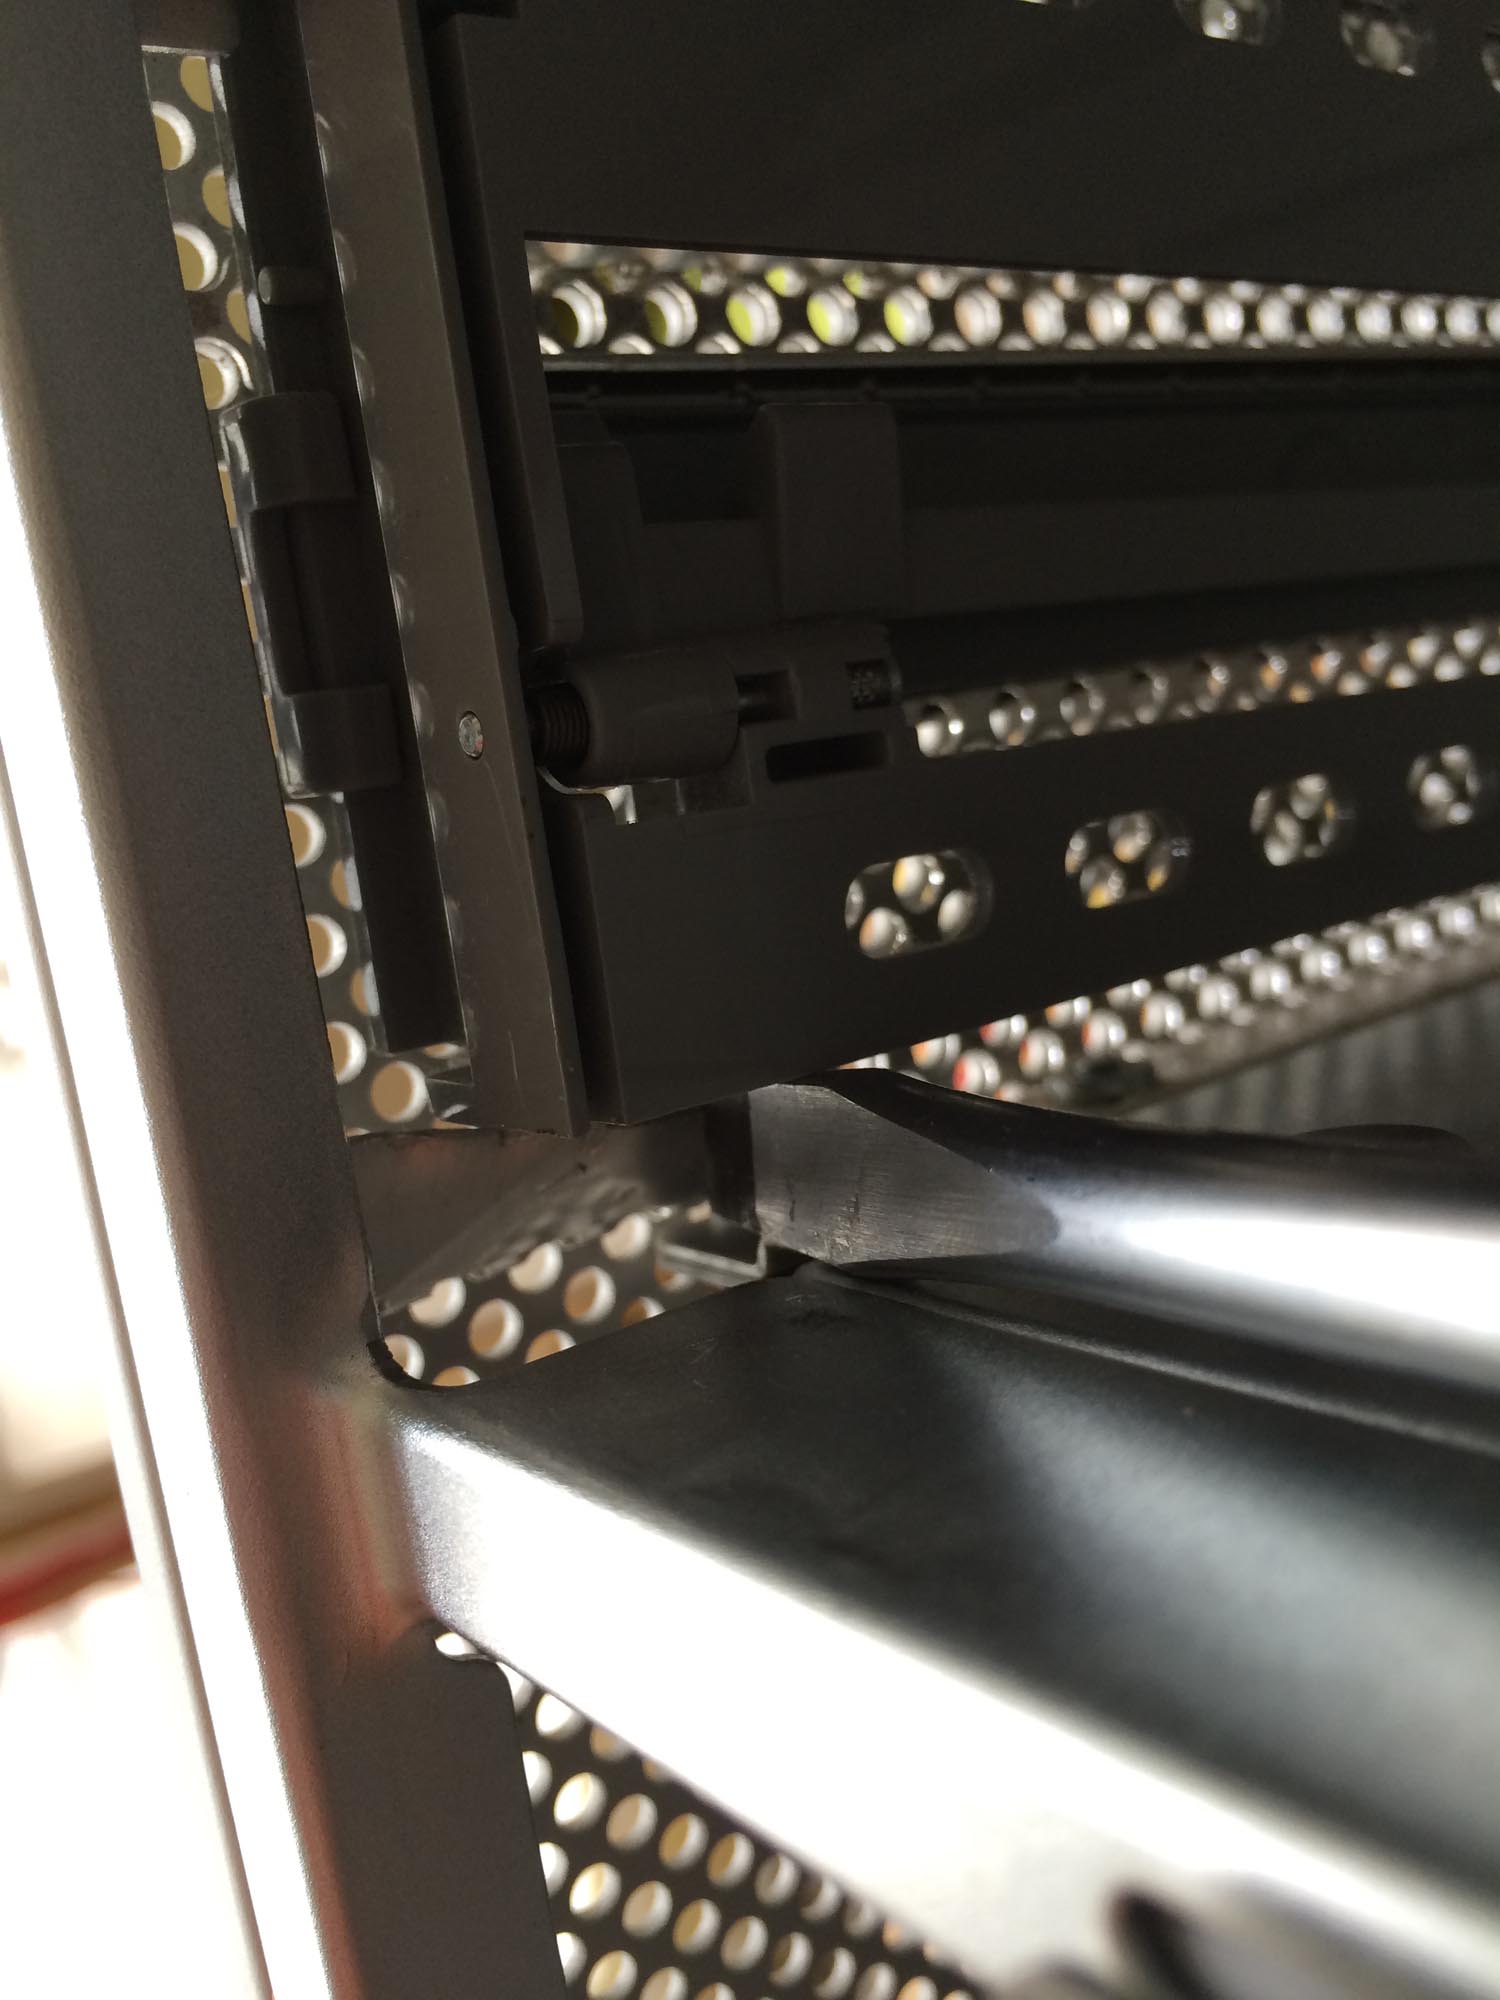
Then put back the 5 1/4” carrier (see the picture on how to do it without disconnecting the power-cables again) and connect the other power/SATA connector from the PSU to your 5 1/4” optical drive (or system-SSD in our case).
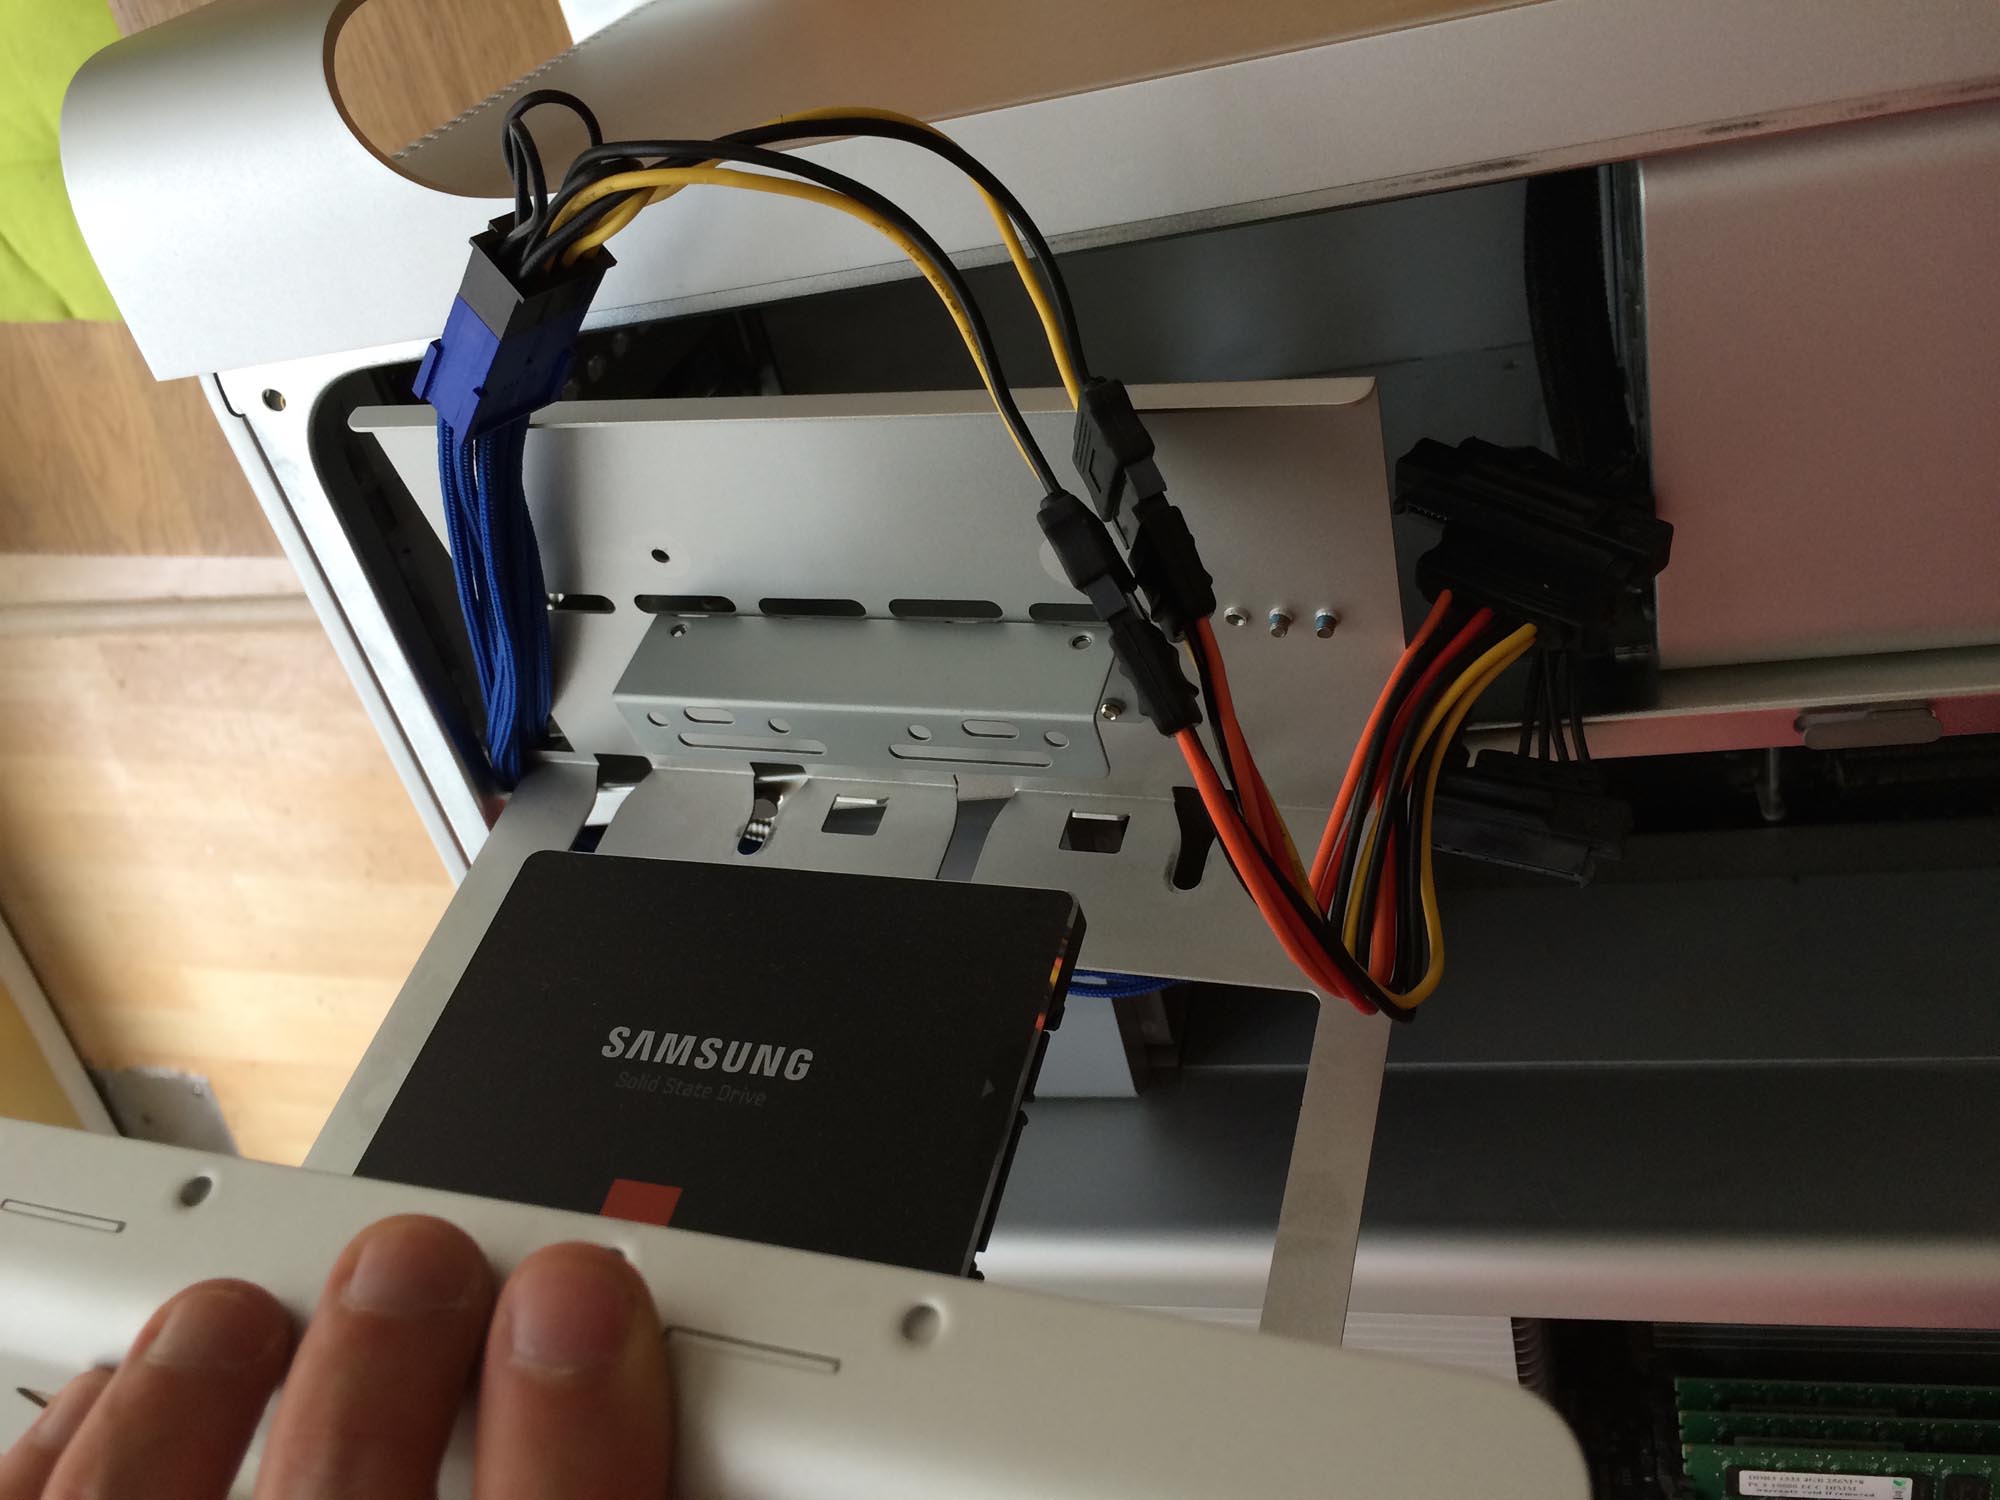
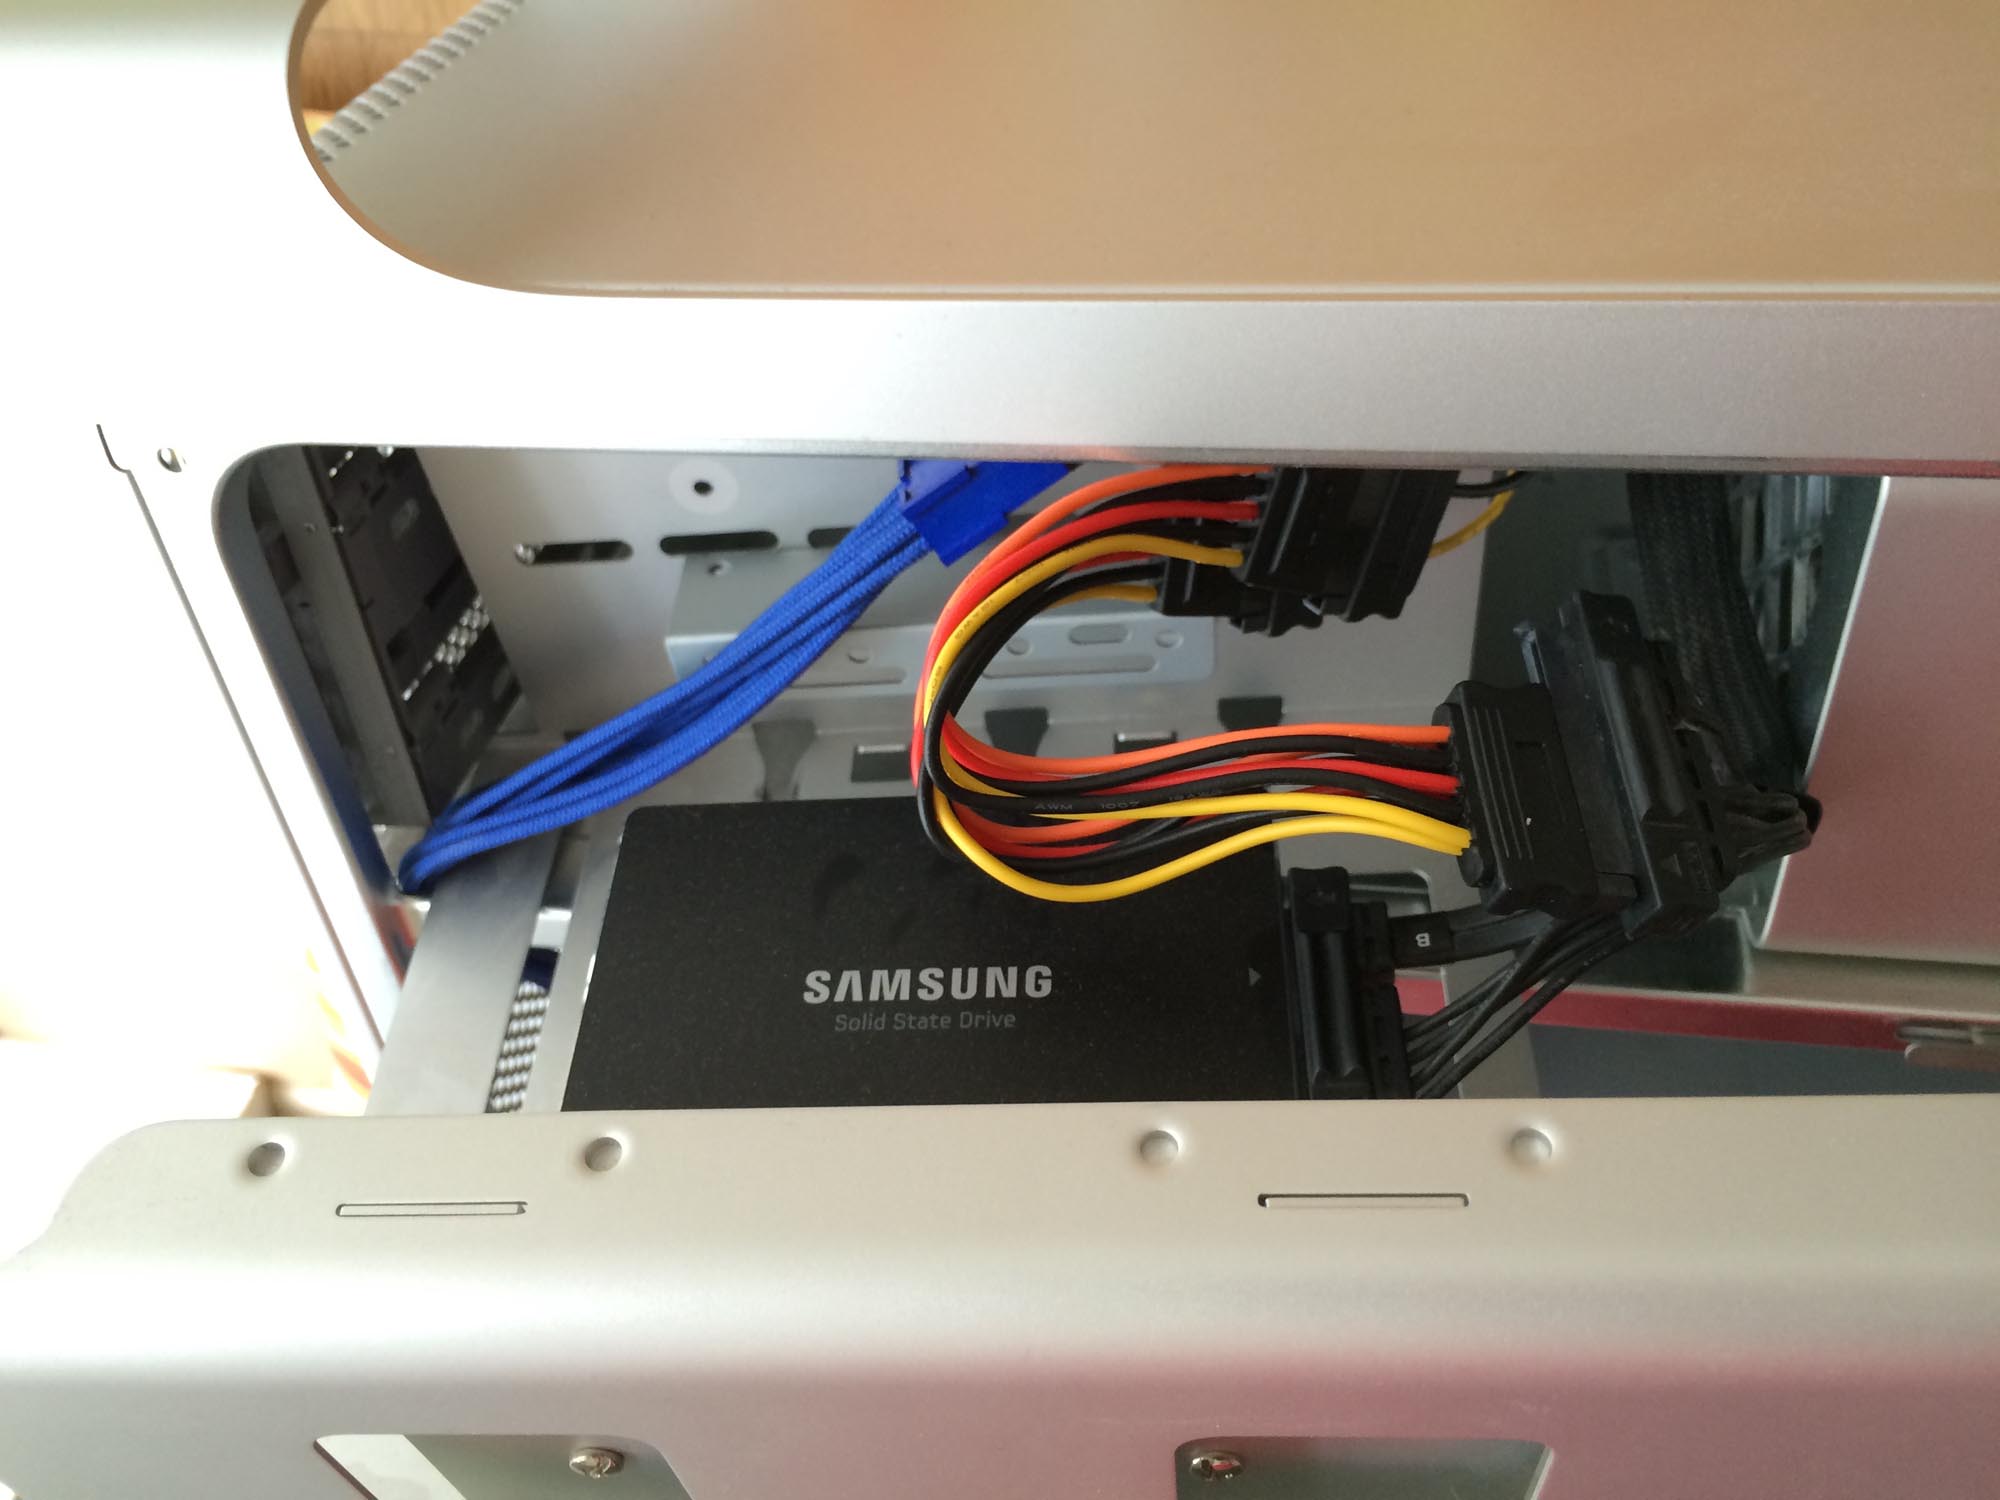
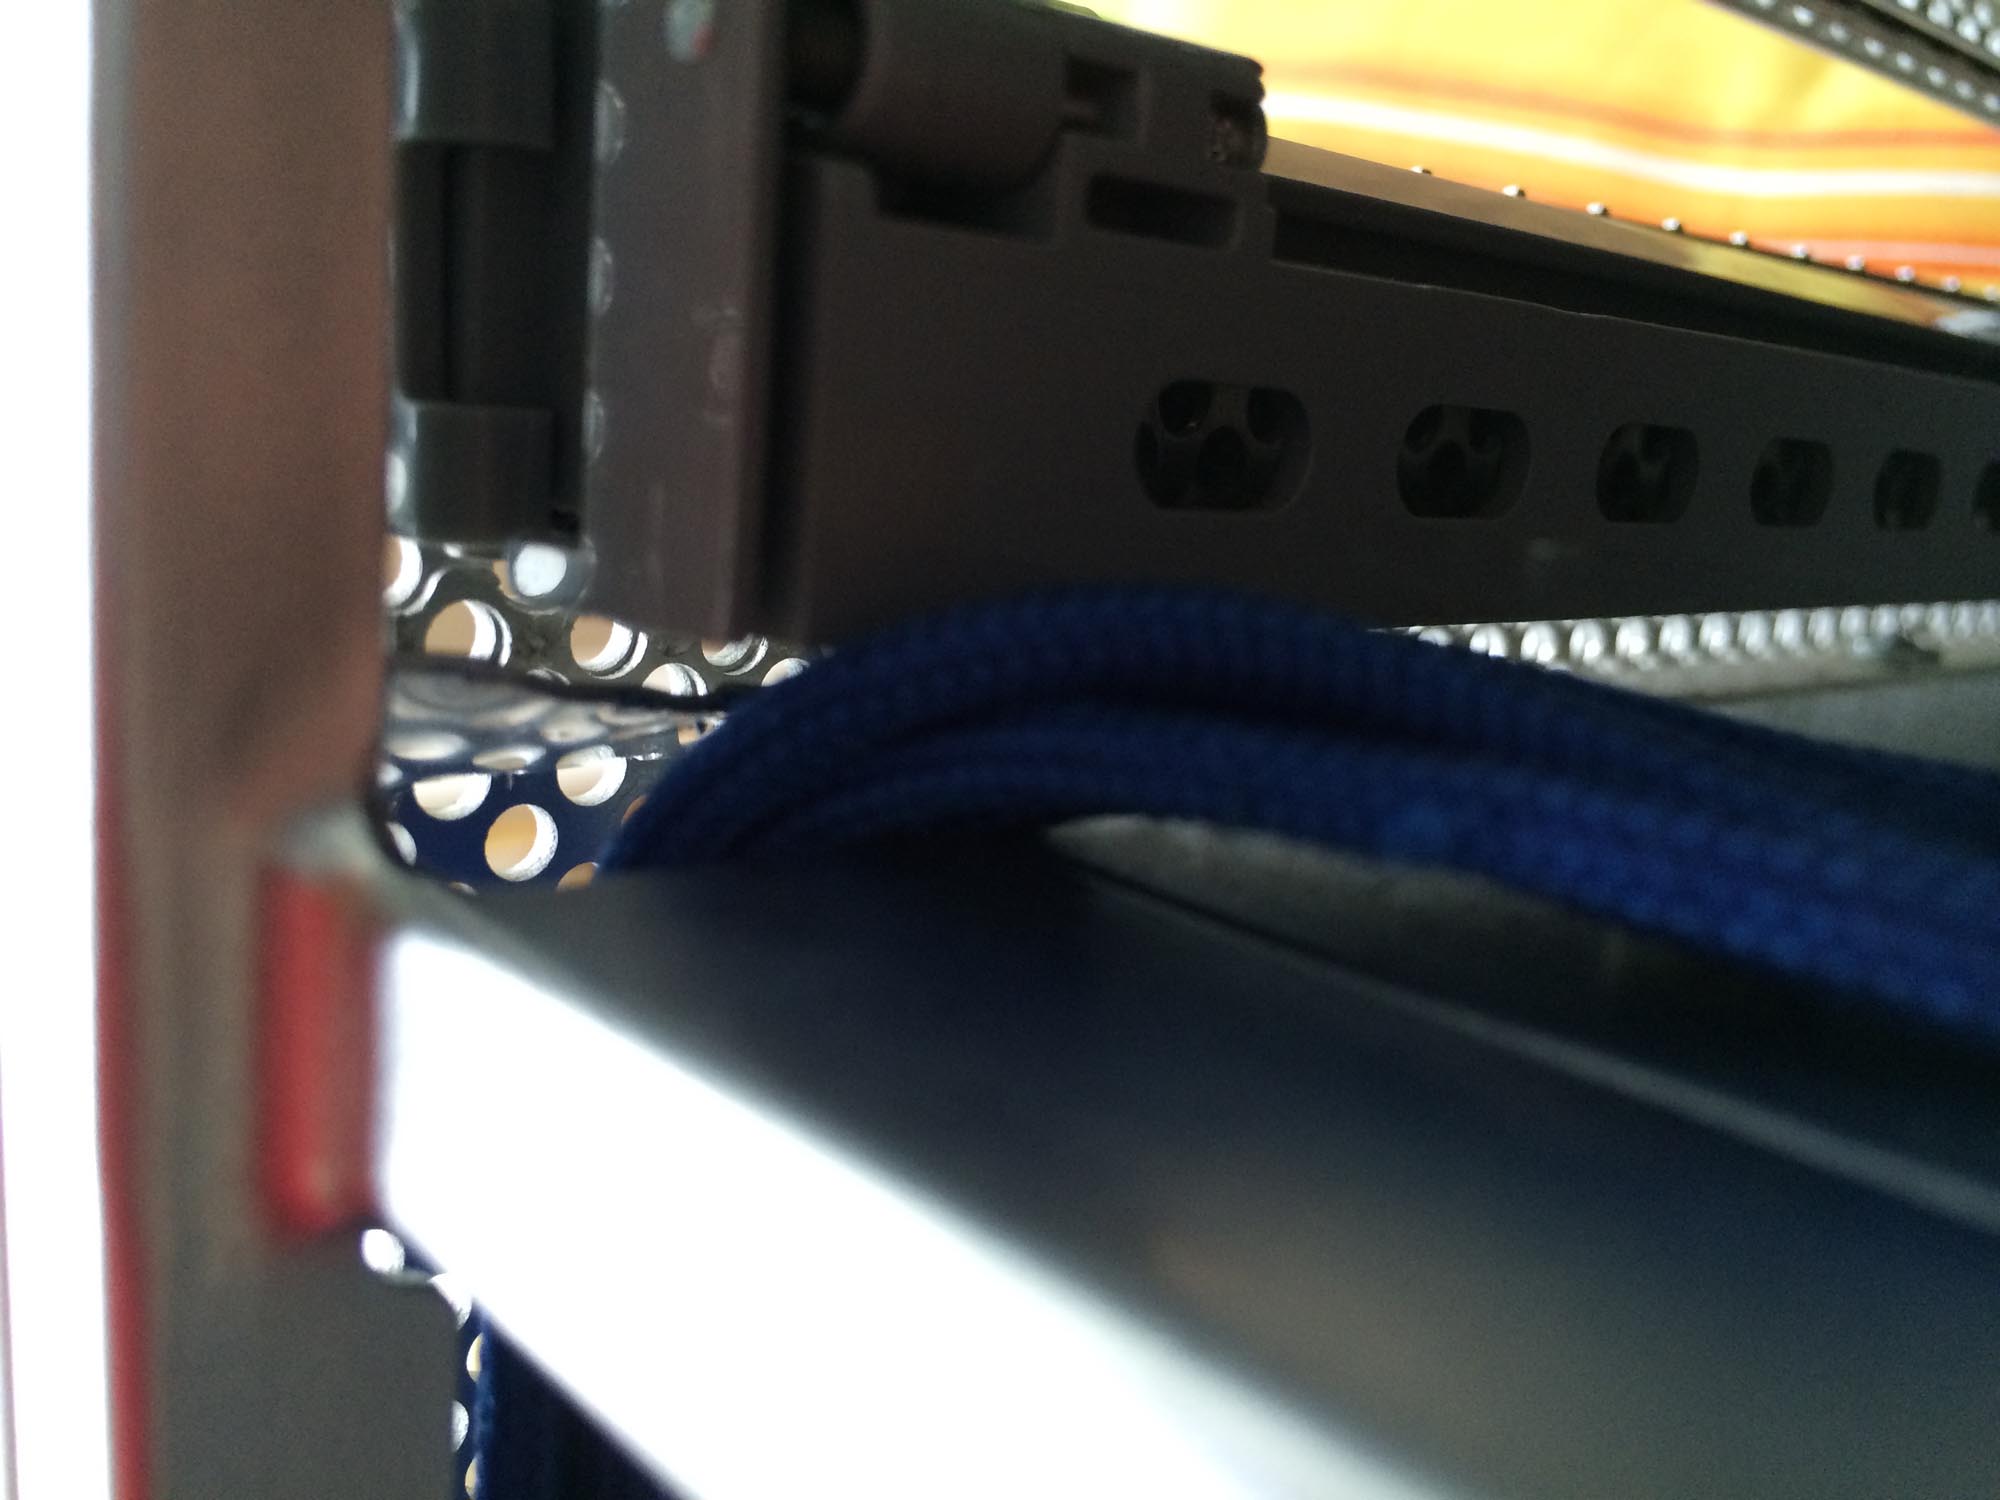
Be careful when sliding in the carrier, as it indeed has kind of sharp edges, which might damage the extender-cable. In order to fit in the carrier 100%, make sure the extender-cable comes out all -under- the grey plastic of the front-frame and not beside of it (see picture).


Next, connect the mini 6-pin to GPU 6-pin adapter to the motherboard and fit the TITAN into the lowest PCIe-slot (as that has space for the two-slot-wide card without blocking another PCIe-slot).
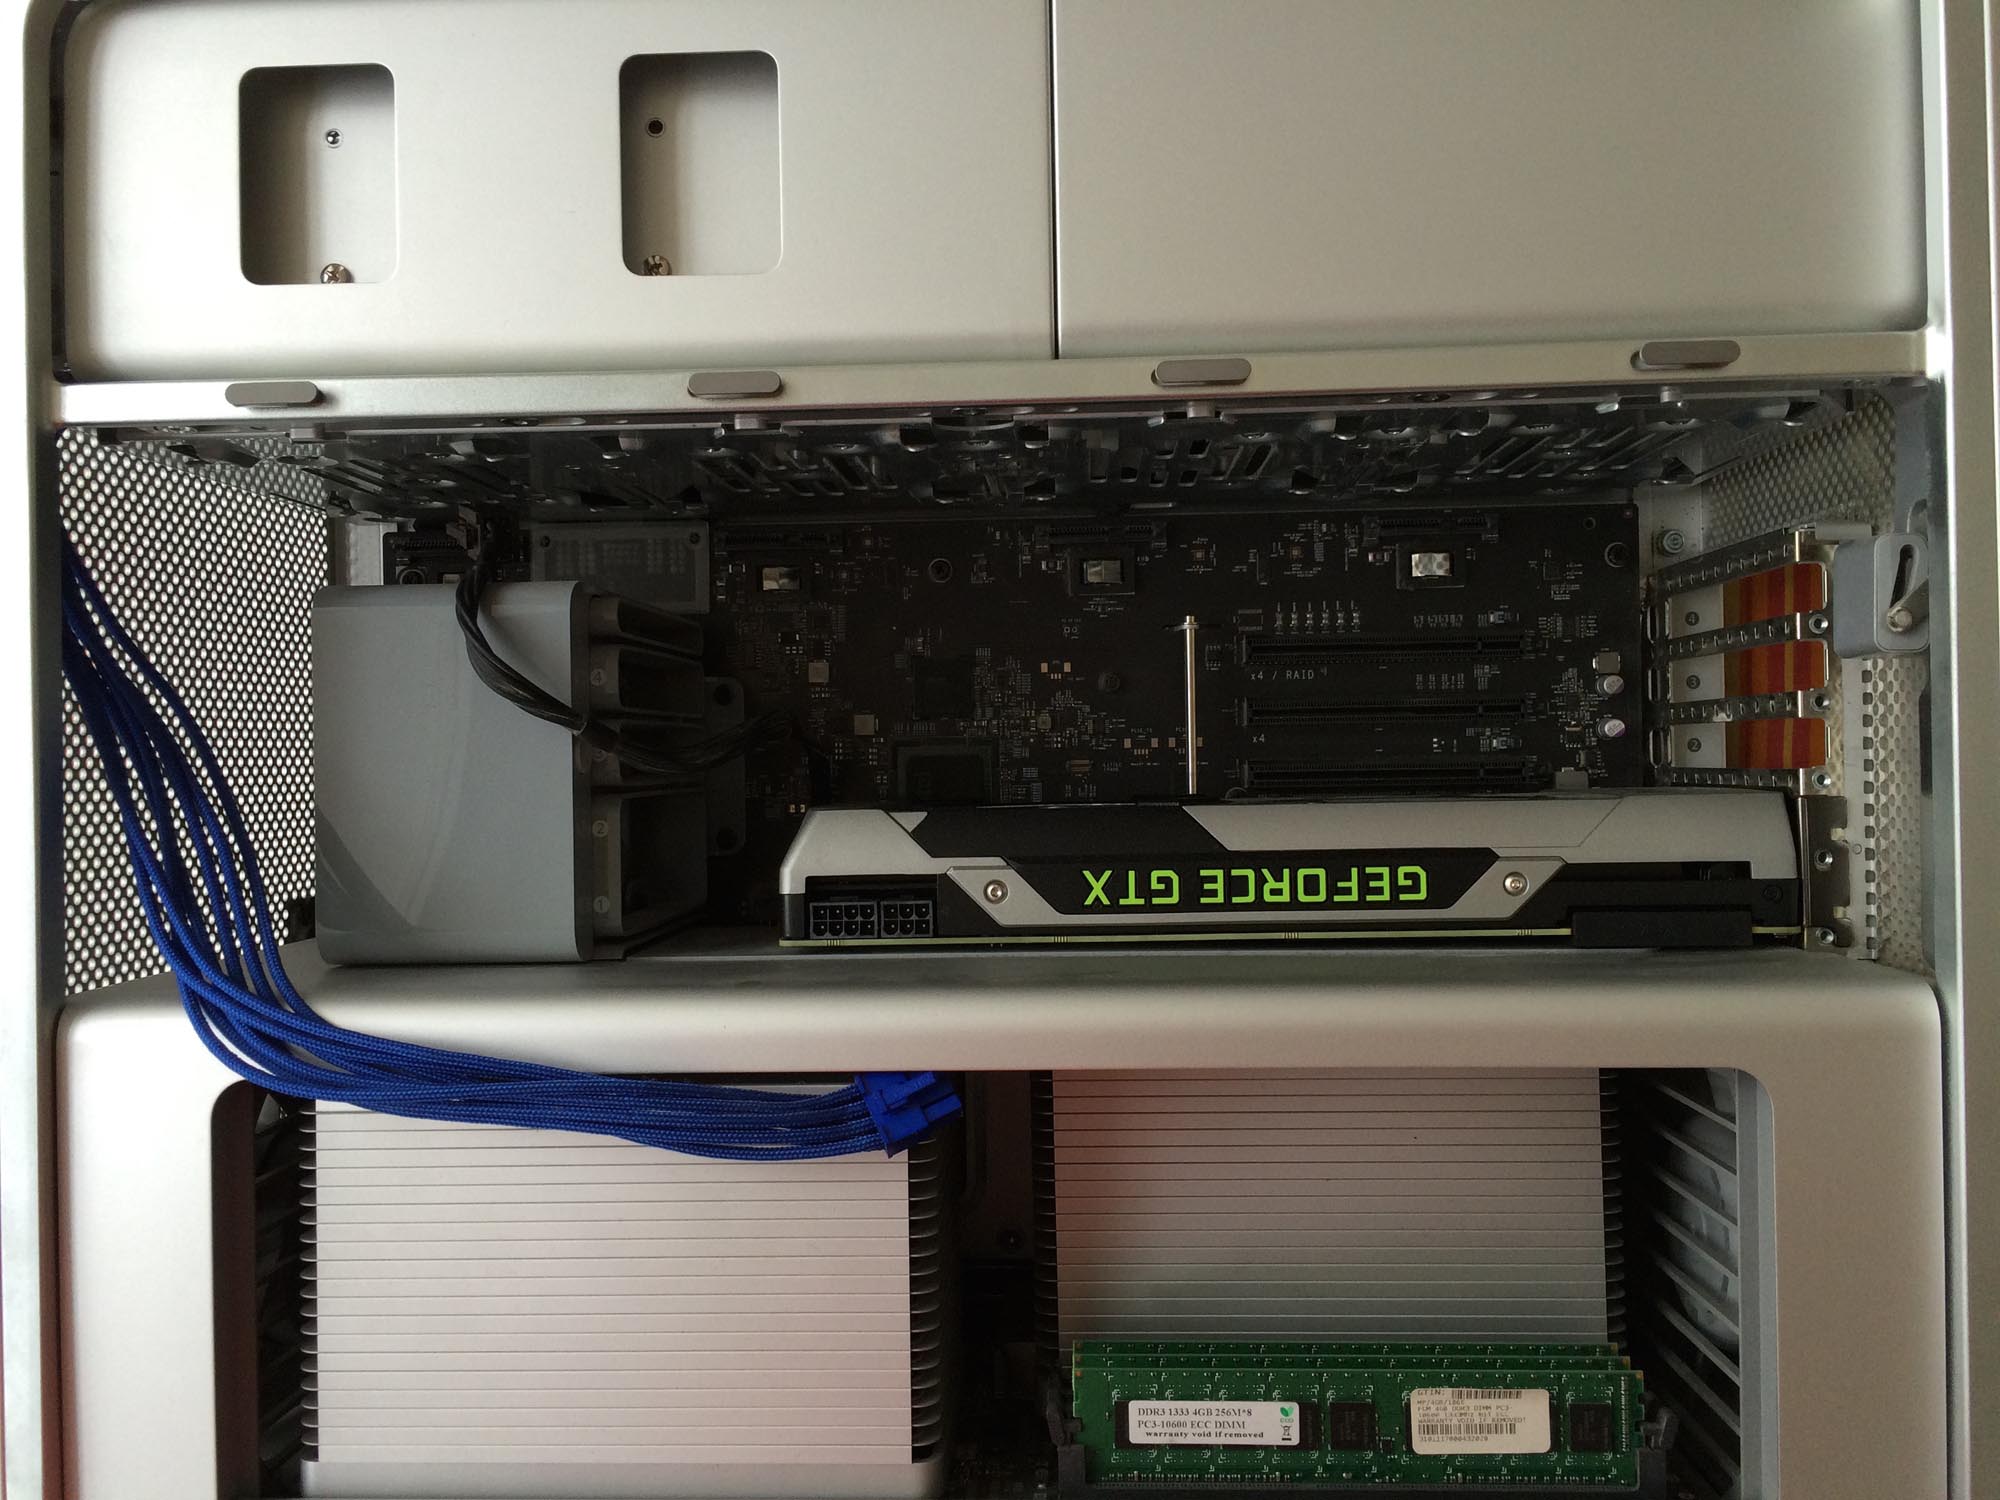 Lastly, connect both, 6-pin and 8-pin power connectors to the card and place back all other PCIe-cards and harddisks. Close the side-plate and reconnect your MacPro to your displays, power and what not.


6) Done!
Power up your MacPro.
The first thing you will see, is that you actually won’t be seeing anything.
Remember, it’s a non-mac card (no UEFI-BIOS), so it does not display the grey bootup-screen.
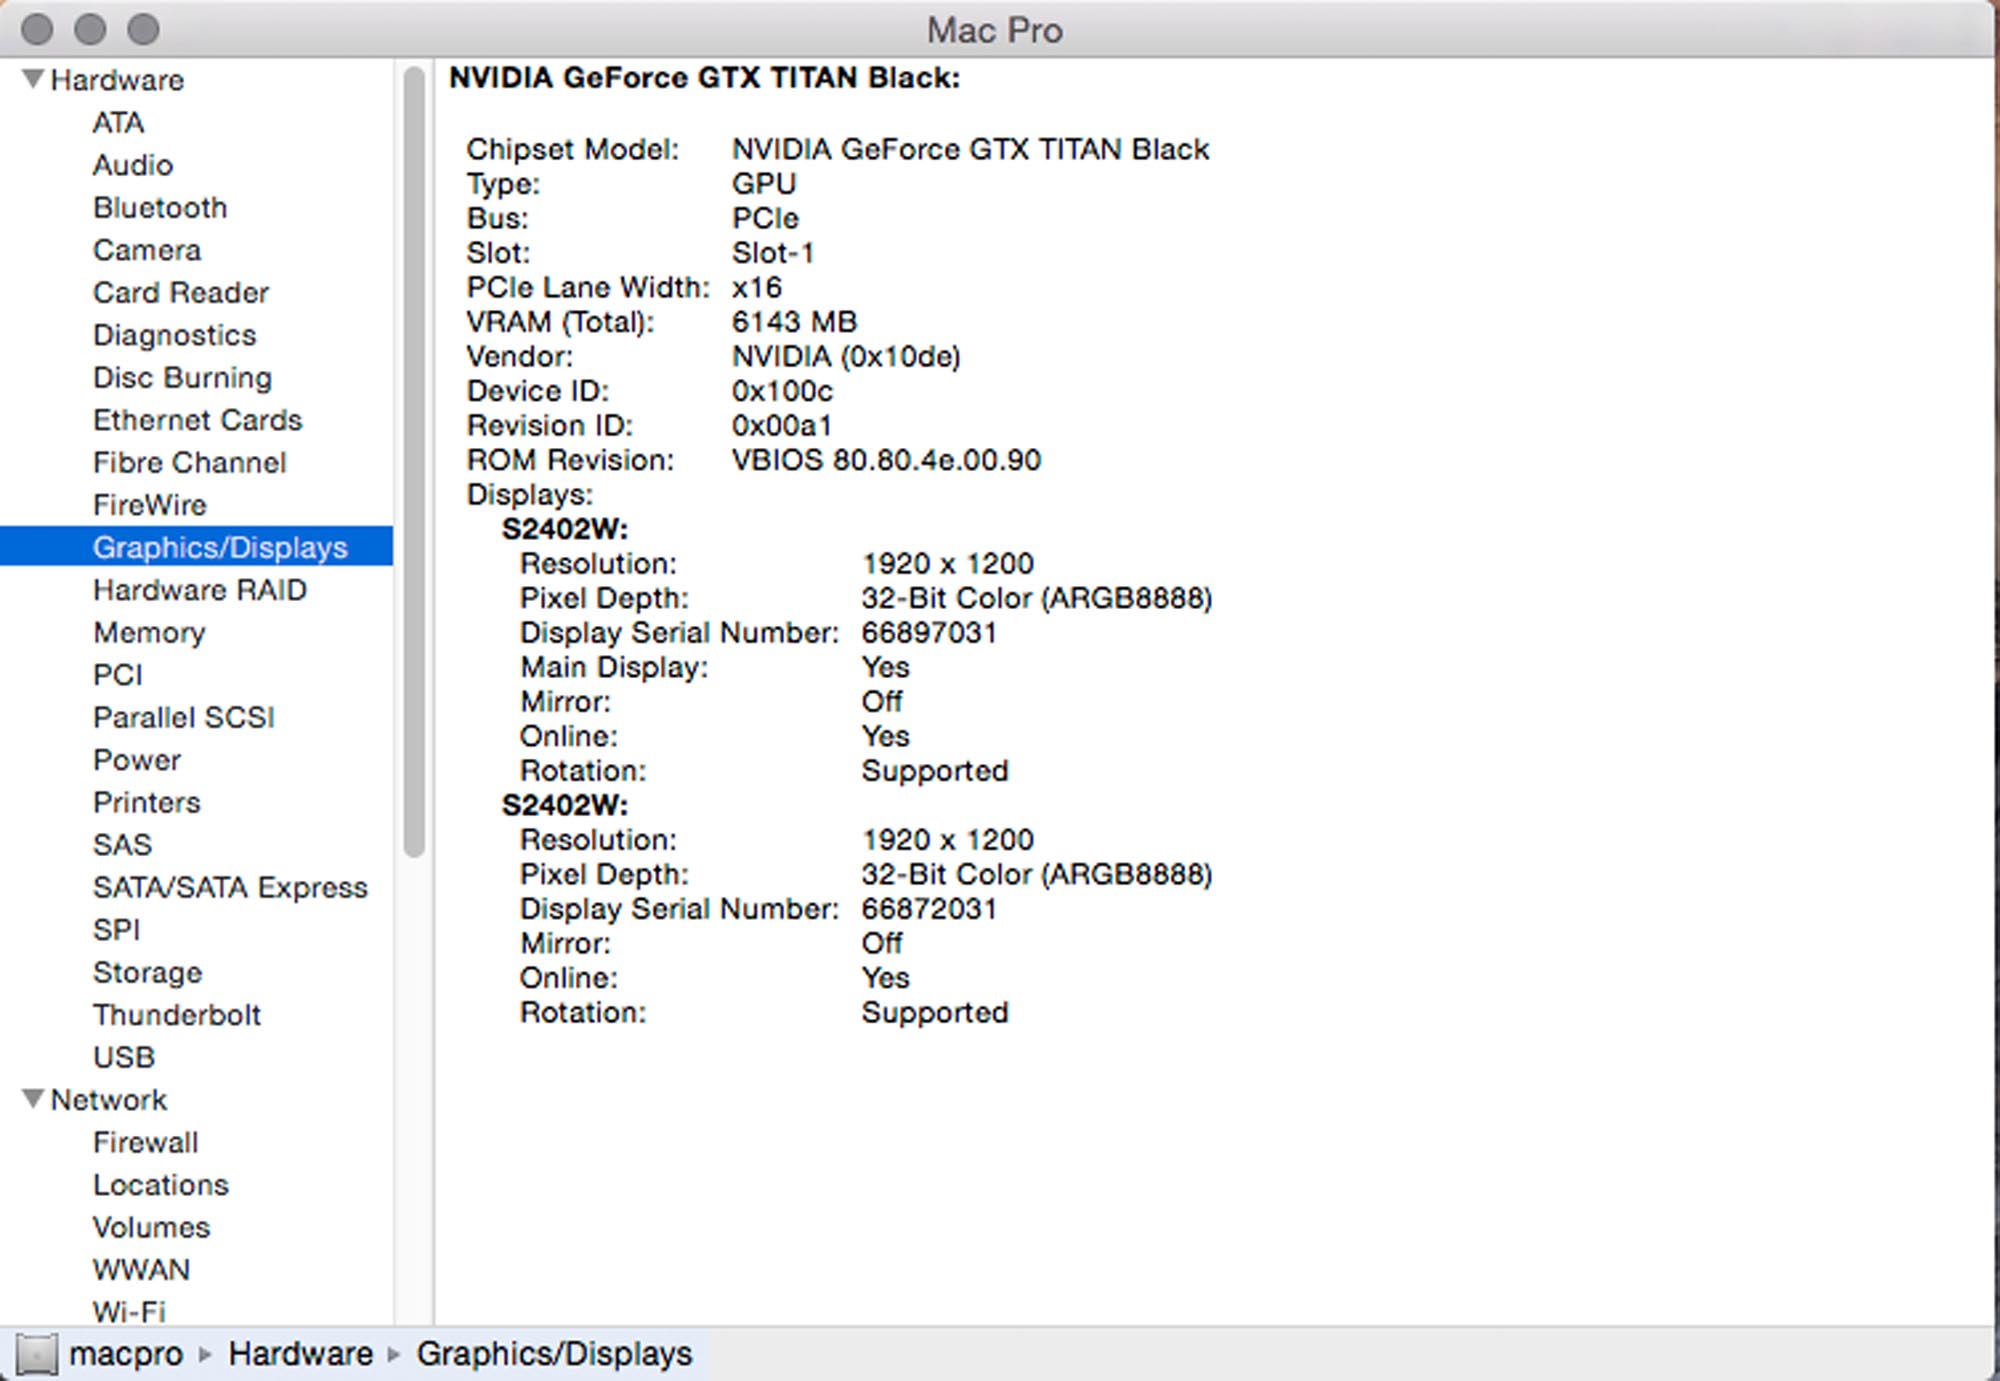
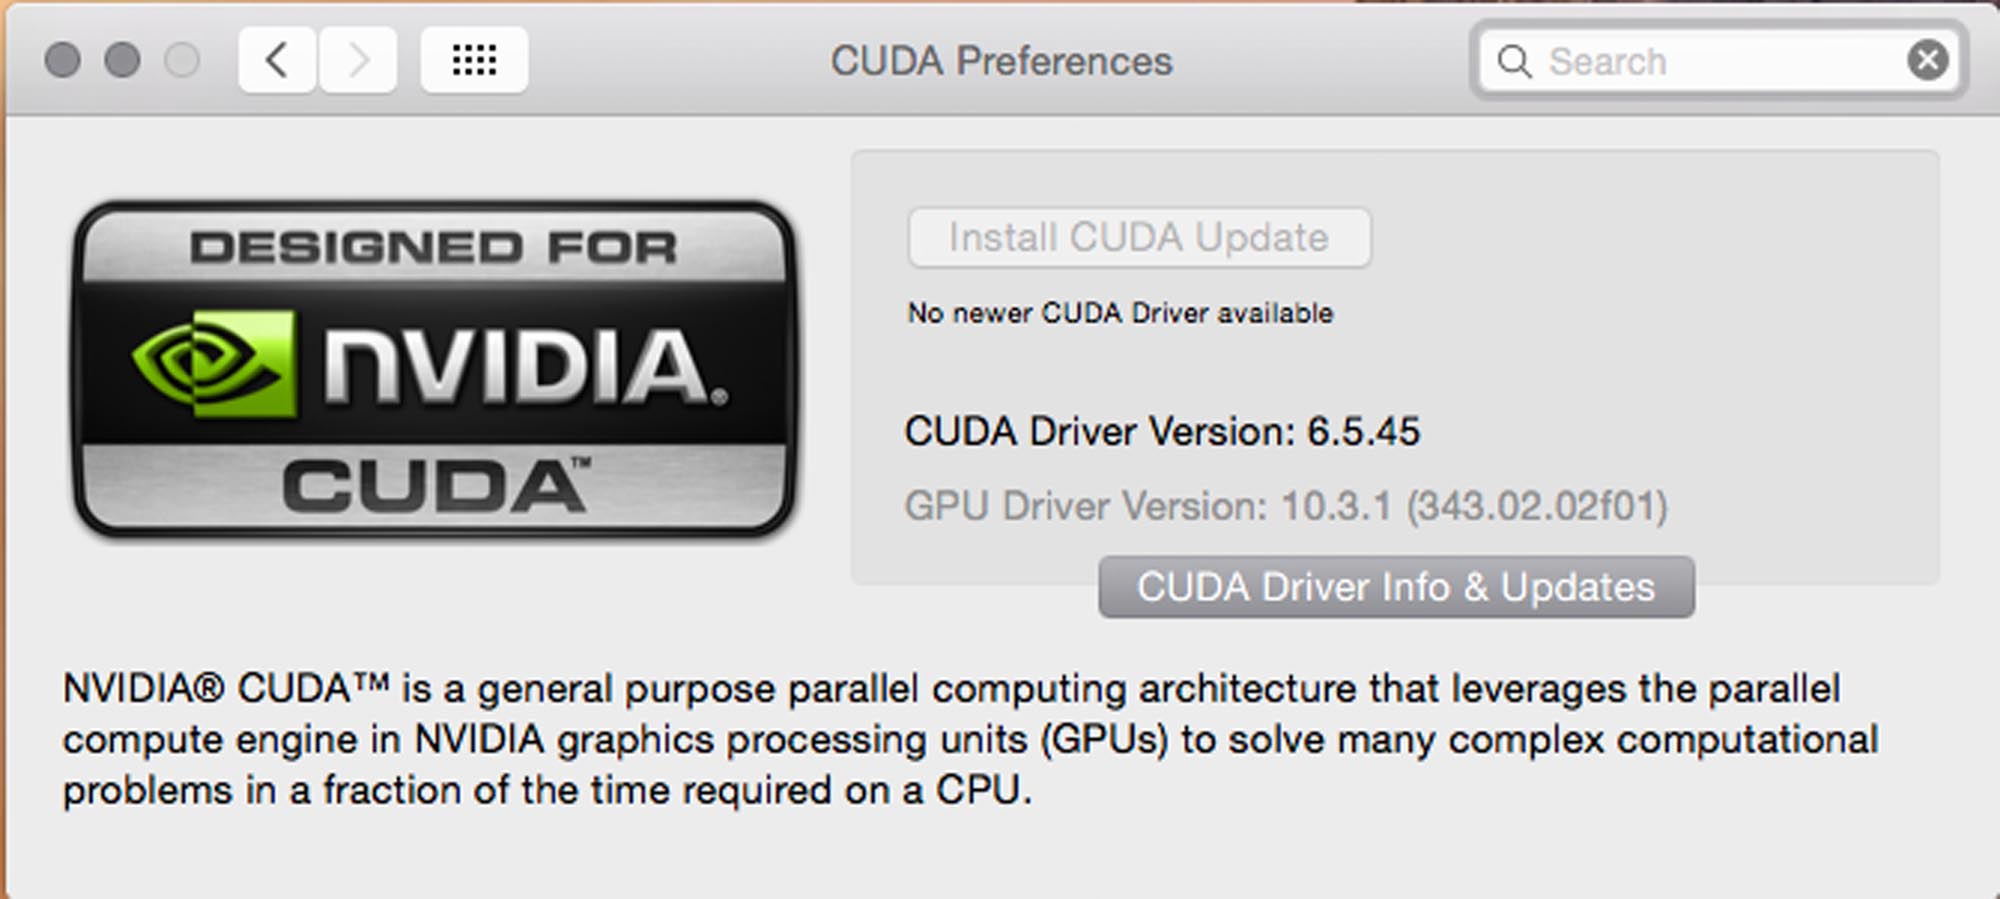
As long as you’re still hearing the “Apple boot sound”, all is fine and your displays will come to life, once OS X has arrived on the login-screen 😉 . Of course, you can always add in a mac-supported card to connect your displays to and have your grey bootup-screen back. To confirm the card has been detected properly, run the system profiler and check your CUDA-driver, if it’s up to date.
After setting this up, we tried out, if there is a difference in performance, if we added a Geforce GT120, or even a Quadro 4000 to the system. Neither in After Effects, nor in Resolve could we notice a difference.
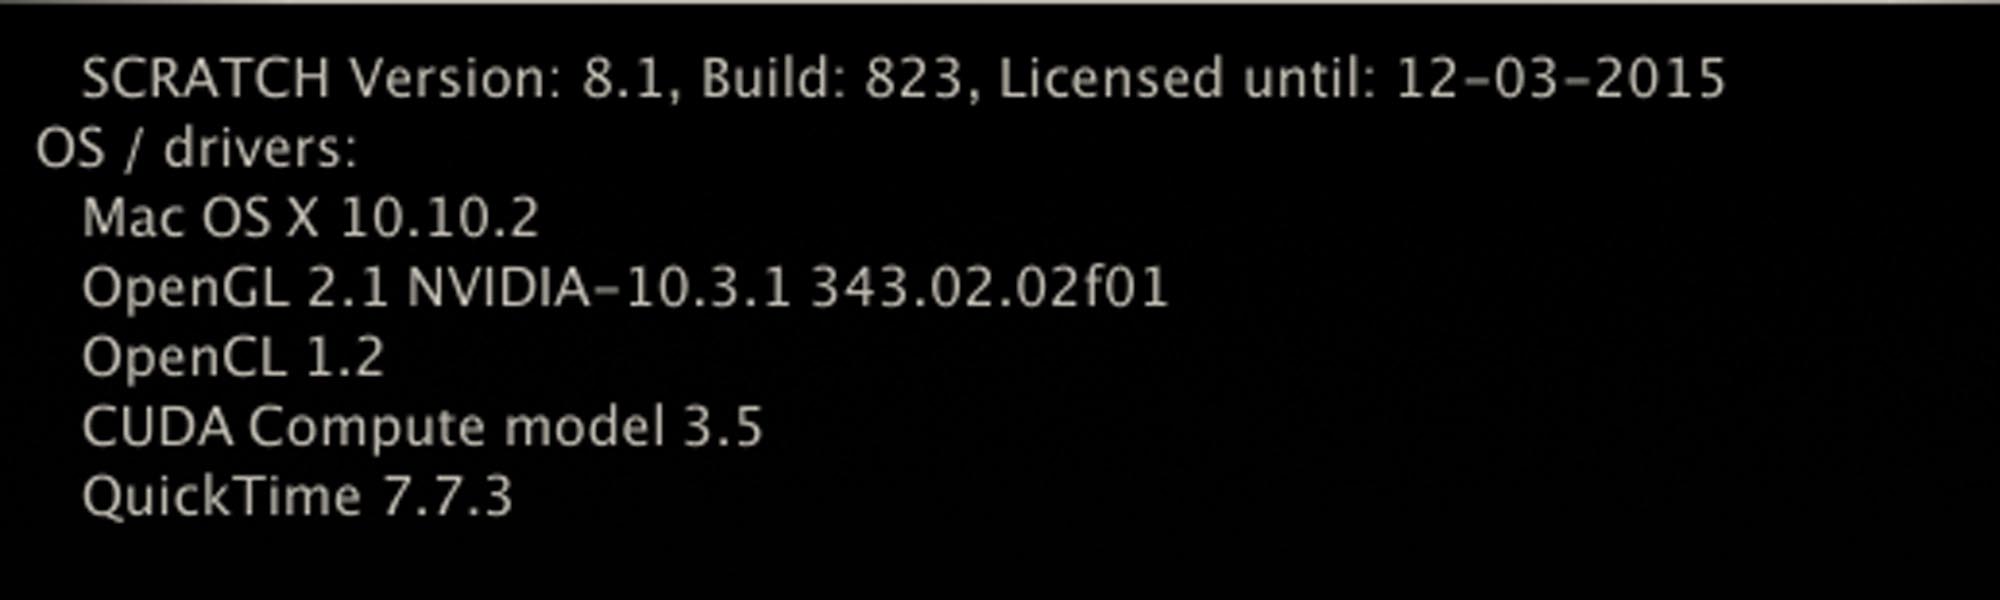
We also tested Assimilate SCRATCH (which only needs one GPU anyways) and it worked like a charm.
Keep in mind, that more and more often the CPU indeed is the bottleneck in older machines. E.g. Quicktime de- and encoding are pure CPU-tasks – so is MXF-encoding.
RED-debayering is also heavily dependent on CPU.
Yes, every grading application does RED-debayering on GPU – still R3D is a compressed Raw-format, which needs to be decompressed (again, pure CPU-task), before the GPU can take over and debayer, what’s coming out of the CPU’s decompression. So, if the CPU is your bottleneck, you can fit in as many GPUs as you want – won’t get faster, because the CPUs can’t deliver the images in the same speed, the GPUs could process them. In this case, we were running dual 6-core Xeons @ 2,66 GHz, which do not max out the GPU – especially not on the MacPro’s older PCIe 2.0 bus interface.
So much for that.
Else, you should download iStatPro and monitor the voltage on the PCIe-slots, and “Power-boost” (mini 6-pin connectors) entries inside there. They should not go below 12V – even, if the GPU is on full throttle. Do some extensive testing with various benchmarks for the tools you’re using on that machine, before actually using it in production.
Nothing is more embarassing, than a complete machine breakdown during a client-session (with eventual loss of precious data).
Hope, this guide is useful to you guys and can help you get up and running with a TITAN card. Keep in mind, the power consumption of newer GeForce cards is indeed much lower at same speed than with the TITAN. However, I have not yet tested those and am not sure how well they might run on OSX.
A very good source of information on all of that matter is this webpage:
http://forums.macrumors.com/showthread.php?t=1440150
All the best and good luck!
Mazze